Showing posts with label Adventures with fabric. Show all posts

Summer dress anyone? :: Dressmaking Inspiration ::

Monday, 21 March 2016

*Do not forget to enter my current giveaway here*

There are a few reasons why I am keen to improve on my dressmaking skills - one of them is to able to recreate some items of my favourite fashion designers, for instance Maje, and save some pennies in the process.

I love Maje style but find sometimes that it just on the too-expensive side for me, especially when it comes to dresses - I hardly wear any so I am not necessarily ready to splash out. However I am a happy browser, and when I saw the Rayano dress in the flesh, I just knew I had to share with you this possible adaptation of the Cami dress, so you could have yours too (for a fraction of the price) - or make another Cami dress if you have the pattern like me!


Pattern: Cami dress by Pauline Alice Patterns (my version is here)
Fabric: I chose an organic eyelet fabric in 'natural', but I also love this organic blue fabric - if you are keen on red, you may consider this one.
Probable modifications: Remove the collar 
(whoohoo collarless, such an obvious modification); 
Maybe shorten it as well,
and Add more fabric to the get a fuller skirt.
Dress: You can buy the dress here


We are looking at a grand total of £55.00 which is not cheap of course, but still saves £250.00 on the Maje dress - a pretty good result - and of course allows me to make different versions of a pattern I already have (and get the colour and borderie anglaise detailing I want)! 

You can see my inspiration to make other designer garments here.


Vintage Inspired pincushion | Tutorial |

Monday, 14 December 2015


Happy Monday everyone! I hope you all had a great weekend. Birthday celebrations were in full swing at ours - it is Baby MiH's third birthday (today) and it was party (and baking) time (this weekend)! I still managed to get a bit of cross-stitching done, and finished my new vintage inspired pincushion - and write a tutorial for you (if you are looking for quick Christmas presents for your sewing friends)! 

The pincushion was inspired by Libby's one I have seen featured a couple of times on her facebook feed. It looks like hers was made of actual vintage embroidered cloth, which I did not have handy. So I made it 'vintage' by cross-stitching on the fabric and placing it on the side rather than neatly in the middle. I used the lovely ethical fabric and buttons I got in my Offset Warehouse Mystery Sewing Box - I love the fabric I got. 

To make your own pincushion, you will need:

  • Some fabric (I used some 'new fabric' but feel free to use some scraps you might have)
  • If you fancy adding some embroidery, choose some matching embroidery thread - but it is optional
  • Some waste canvas for the embroidery
  • Polyester soft toy filling
  • Some matching thread to close the pincushion.  
  • Make a circle template for your pincushion - I used a vase to make mine. 


1. Place the waste canvas on your fabric. I put it in the middle so that I had enough fabric on either side for the pincushion.

2. Use this method for the waste canvas and cross-stitching. I went a bit free style with mine - so let your creativity flow. The only requirement is that it covers some of the pincushion. 


3. Place your pincushion template on the folded fabric, placing the embroidery side ways (if you are going for a more vintage look)


4. Sew around the template, right sides together - remember to leave an opening to fill the pincushion 


5. Turn your piece right sides out. Finger press the seams open. Then stuff. Use a lot of small bits to stuff your cushion. Push the stuffing up against the inner seams. You want the stuffing to be very full but not too firm. Sew the opening closed.

6. Find the exact center of your pincushion on each side and mark with a pencil or pen. If you are off center, your finished pincushion will have uneven sized sections, so take your time.

Sew a few stitches with your thread to create a firm anchor. 

Create each section by bringing the thread up from the middle, around the outer edge and then inserting the needle back into the center. Give the thread a firm tug to create the pillow effect. It may be difficult to work the needle through the center. I made 8 sections for this pincushion, up to you how many sections you want (4,6,8, more?). 


7. Add your button, I did also add a bit of fabric underneath to hide the middle. 


 And here you have it, a beautiful new pincushion, ready for use within an hour (without the cross-stitching part). 

This is my challenge entry for 'space'.. Because of the space in the middle of my cross-stitching pattern. For better interpretation of this month's theme, and a chance to enter our giveaway, check out the projects here

I love seeing your projects using my tutorials, so don't forget to tag me if you make one (on IG, twitter or facebook). 

How colour analysis can help you choose fabric and yarn :: By Kate from Fabrickated ::

Sunday, 22 November 2015

Happy Sunday everyone! I hope you had a great weekend. I love having guest bloggers in my blogging space. I learn so much every time, it is really inspiring. Colour analysis is something I've been wanting to know more about, to make better decisions when it came to buying wool and fabric. And when Kate asked me to come over and have my colours done, I did not think twice, and I was in her office within a week. I was of the view that if I learnt more about my complexion and what worked for me, I would be wasting less money on fabrics that do not suit me, and splash out on those that do. It is another sustainable way to look at fashion. 

Also Kate is amazing fun to spend time with, and totally inspiring. She is an active blogger, as well as the Chief Executive of a housing association. And yes, she does have children, and grand children - I mean whoah amazing. So you get your colours done, and a great dose of inspiration.

I will leave it to Kate to explain how she approaches colour analysis and what her conclusions were for me (hopefully I will make full use of these findings)! 


I love colour and I like making clothes. While I have always known, more or less, what colours suit me (trial and error – lots of them), I wanted to know what colours suited my family as I like to make presents that will suit and please them. So a few years ago I trained in colour analysis and I am happy to share my skills with others.

If you are a keen knitter or dress maker you will spend time choosing just the right fabric or yarn for each project. You may be considering:
  • The right fabric for the pattern
  • The quality and price of the fabric
  • How much it will go with the rest of the wardrobe
  • How much you like the colour, texture, pattern etc
Do you consciously think – does this colour really suit me?

Do you hold the fabric up in the shop, draping it over your body, and think – does this piece of cloth or ball of wool make me look more beautiful, brighter, less tired – or does it emphasise the little imperfections in my skin?


The thing is, on the whole, certain shades work really well together. Not all reds looks great with all yellows, but certain reds and yellows look amazing together. Normally this is because they are going in the same direction. So a yellow with a warm undertone will match a red with a warm undertone. A deep purple will usually work great with a deep green. A muted orange will work nicely with a muted brown. If you look at patterned fabric you will see that normally the designer has stuck to one direction (black and white works as they are both bright colours), although sometimes one contrasting element can work well.

You may have found in nature how colours work harmoniously together – a pale blue-green birds egg with a light orangey brown speckle; a tropical flower that includes the brightest orange, yellow and green; a girl with deep brown skin, deeper brown eyes and black hair.

So humans have a natural colour palette that tends to work beautifully together. Take the classic red head with light skin, freckles and light greeny eyes; or snow white with her red lips, white skin and black hair. Harmonious colour palettes.

So the point of colour analysis is to determine what your primary colour direction is – deep or light; cool or warm; bright or muted. Many of us have a secondary direction as well that helps inform the primary direction.


 When I analysed Nat’s colours I found that the light colours looked great on her – colours with quite a lot of water in them, relatively speaking. The deepest shades tended to made her skin look a little tired and grey.  But we found that the muted shades were also better than the brightest shades. So Nat looks best in lighter colours with a softer look. Now she knows which colours look best (I gave her a colour chart of the types of shades that look the best on her), I would say there are a few advantages that she might enjoy.
  • Helping her choose what wool or fabric to buy for each project, saving time and money and reducing waste
  • Ensuring that everything in her wardrobe will work with everything else, making it easier to put outfits together
  • Giving her the confidence to wear more colour, certain that it flatters her delicate pretty complexion
  • Knowing that a nicely put together, harmonious look will add to her self confidence
  • As a knitter and dressmaker she can use the information to create patterns, blends or mixes of colours that work brilliantly together
  • When what we wear is harmonious with our own colouring it helps to give a good impression to those we meet.


Well I am feeling under pressure to make the right choices, but also more confident to make choices. I have my colour chart in my purse, and take it with me everywhere. To be fair, my colours are probably colours that I liked already, but it has certainly widened the range of colours I could consider wearing. And hopefully I will be confident enough to add more colours in my wardrobe (when I finish knitting all the grey wool in my stash...). 

When Isabel met Alice :: Sewing and Embroidery ::

Wednesday, 28 October 2015


Happy Wednesday everyone! F-I-N-A-L-L-Y this post is out! Here is my ethical Isabel Marant inspired embroidered top (a bit of a mouthful to be honest). The full tutorial is available on the Offset Warehouse blog. But here are some details...

I used their soft bamboo silk - I loved working with that fabric, and it is even better being worn. The embroidery work is inspired by pins on my embroidery pinterest board - and took f-ing ages, just saying. And finally, the pattern is... yes the Alice Top. I mentioned when I made my first version that it was to check the fitting for another version - and this was it! 


I worn this top a few times already. Would I make another top like this again? My brain is saying no way, my crafty heart is thinking that it would be a shame that my many pins and inspiration on pinterest go to waste. 


If you use the tutorial, or buy from Offset Warehouse, let me know about your experience! I would love to hear from you. 

Grey and Wild :: Sewing ::

Monday, 14 September 2015


Happy Monday everyone! I have a really cute make to brighten your Monday - especially if the weather is as grey as ours. I sewed my first (sort of) baby coat! And Little Baby MiH is about to wear it quite a lot. 

It feels like I have been working on this project for nearly a year - since I was inspired by this post really. In fact, I bought the pattern and fabric from Ma Petite Mercerie within a month of seeing the post - the outer fabric is this one, and the beautiful lining this one. No ethical fabric this time, but I am destashing as the project has been sitting in my stash until last Thursday when it was really time to make something for Le Challenge for the theme: wilderness


As you can see I changed the front opening - I used some shoe laces and buttons from stash. I think it works much better - and in fact I am not sure I would have considered the pattern without seeing Jenny's version. 

The pattern is really well explained, a real pleasure to sew but we need to talk about the size - it goes from 0 to 18 months. Brilliant, so I thought, I will be able to make another version for next winter. Except that I had to sew the 18 months size after measuring Little Baby MiH. He is tall for his age, for sure, but not 18 months tall yet. The coat fits him perfectly though, so if you are sewing for a baby, do measure him/her. 


For all other wilderness makes, go over to Le Challenge and come and join us! The next theme will be announced tomorrow! 

Natural Shades of Pink :: Dyeing Fabric with Avocado Skins with Rebecca Desnos

Saturday, 12 September 2015

I am really excited about this tutorial as I have been wanting to dye with avocado skins for a long time - and Rebecca's step by step tutorial is making it easy for me (and you) to try . I dyed naturally yarn in the past – but my results (and process) are so random that I have not tried again. But now that the key ingredient to this tutorial is something I eat a lot of is brilliant, so it should be quick (and easy) to get enough dyestuff!


If you use her tutorial, please let us know and share your makes! 


My name is Rebecca Desnos and I'm a natural dyer who works exclusively with plant dyes and plant fibres. I'm vegan so I don't use any animal fibres such as wool or silk, or animal-derived dyes such as cochineal.

Several years ago I began dyeing with plant extracts such as madder, which produce beautiful and reliable colours, but I discovered that it's much more exciting and rewarding to make my own dyes from scratch.

Avocado skin dye is my current favourite dye and I've always got a jar of dye in the fridge ready to use. The colour is so pretty and I'm always finding new things to put in the dye pot. I think it helps that avocados are one of my favourite foods, so I manage to save up the skins quickly!

I have an Etsy shop with a selection of plant dyed scarves, bags, cushions covers and wooden beads.


This is just my own method of dyeing with avocado skins, but it’s not the only way to do it. It’s through experimentation that you will find what works well for you and you might find an even better way of doing things. For example, how about using rainwater instead of tap water? Try a different type of saucepan to see if that affects the colour. The possibilities are truly endless.


To prepare the fabric for dyeing:

These instructions are for dyeing cellulose (plant) fibres, such as cotton, linen or bamboo.


1. Prewash fabric in the washing machine in a natural laundry liquid (I use ECOS Earth Friendly laundry liquid). Either allow to air dry or go onto next step.
2. Pour a litre of unsweetened soya milk into a bucket and dilute with water. I usually do roughly 1:1 ratio of water to milk. Drop fabric into the bucket of watered down milk and stir. Leave to soak overnight, stirring it a couple of times before going to bed.
3. In the morning, lift out the fabric and squeeze out as much of the soya milk as possible, then put on a spin cycle in the washing machine.
4. Leave to air dry.
5. Drop the fabric back into the bucket of milk for a quick dip. The aim is to coat the fabric evenly with soya milk, without removing the previous dried on layer. If the fabric sits in there too long, the first layer of soya may rinse off.
6. Squeeze as much milk out of the fabric as possible and put on another spin in the washing machine and then leave to air dry.
7. Do a final quick dip in the soya milk, then squeeze out as much milk as possible hang up to drip dry. Depending on the weather, this final stage can be a bit smelly, so it’s best to dry outside if possible.
8. Once the fabric is completely dry, place it in a plastic bag and store it for at least a week before using.


Note: This soya milk method is not my own, and I first read about it in India Flint’sbook ‘ Eco Colour’. The idea is that the protein in the milk coats the cellulose fibres and makes them more protein-like, increasing the absorption of the plant dye. From my own tests I’ve found that this method really does help achieve darker shades.

To prepare the avocado skin dye bath:

I collect avocado skins over the course of a few weeks. I scrape and rinse the skins then place them in a bag in the freezer. I’ve only dyed with hass avocados as these are the only ones available in my local shops, but I’m sure that other varieties produce equally beautiful shades.


1. Weigh the dry fabric and use at least this weight of avocado skins. The higher the ratio of avocado skins to fabric, the more concentrated the dye, and therefore the deeper the colour. I often use 2:1 ratio of avocado skins to fabric to get a really deep colour.
2. Place the avocado skins in an aluminium saucepan and cover with tap water so that all skins are submerged. 
3. Heat for at least an hour and stir from time to time. The skins will soften and break down.
4. Leave to cool, then strain the mixture through a sieve lined with a fine cloth such as muslin. The colour of the water should be a deep red. Squeeze the pulp in the cloth to extract as much of the concentrated colour as possible.
5. The dye is now ready to use. If you’re not ready to use straight away, it can be stored in the fridge.


Dyeing the fabric:

Decide how you will dye your fabric. Will you dye it an even shade? If so, you may need to add extra water to the dye pot so the fabric can move about freely. Will you fold up and tie the fabric to create patterns?


1. Drop the fabric into the aluminium saucepan (reserved just for dyeing) and add extra water to make sure all the fabric is submerged and can about move freely. 

2. Heat the saucepan for at least an hour and allow the dye bath to simmer, ensuring the fabric is always submerged. Stir from time to time with a wooden spoon (never to be used again for cooking!) and keep a close eye on it to make sure that it doesn’t boil.
3. Leave the fabric to cool in the dyebath over night. 
4. Further heating may deepen the shade, but may not be necessary if you already have a deep shade. 
5. Take the fabric out of the dyebath and squeeze out as much liquid as possible and leave to drip dry.
6. Once the fabric is dry, it’s best to be patient and let the fabric sit for at least a week (the longer the better) before rinsing. This should help with the fastness of the dye.
7. Once I’ve rinsed the fabric, I usually put it on a short wash cycle in the washing machine, then let the fabric dry naturally. Then it’s ready to use for whatever you’d like!


Note on light and wash fastness:

According to my own tests, the colour lasts well using this soya milk method, but it is dependent on so many variables, so you would need to do your own tests to see how fast your colour is.
Please bear in mind that all dyes, even synthetic ones, will fade in bright sunlight, so it’s important to treat dyed fabric with care. I always store naturally dyed scarves in a cupboard to avoid fading. I also avoid washing naturally dyed fabrics too frequently and will often air out a scarf rather than washing, to help preserve the colour.
I’ve found that avocado skin dye fixed with this soya milk method to fair well in light fastness tests (actually better than some other dyes fixed with chemical mordants!) and it actually yellows if it’s exposed to sunlight, rather than fades.

Thanks Rebecca for this amazing tutorial, please share your makes with me and Rebecca, she is on IG and twitter @rebeccadesnos! 


Upcycling for my boys - Part 3 :: Sewing ::

Wednesday, 17 June 2015


Handmade in action aka the post featuring the chubby legs and the elusive toddler


More on the bloomer here
More on the trousers here

Upcycling for my boys - Part 2 :: Sewing ::

Tuesday, 16 June 2015

A bit later than expected, here is the second part of my Le Challenge project - and my first pair of trousers, ever. If you have read the first post here, you know that the fabric I used is upcylced from my own trousers. After the bloomer for Little Baby MiH (I should really have done these items the other way round), I had a bit of fabric left but I was not sure I had enough. Hence the funky pockets (Leah Duncan fabric used here). 


I was lucky my trousers had really massive hems which gave me extra fabric for the belt. I did not make the back pockets, because it was wasted fabric (and time) - and to be honest I am not sure Baby MiH cares that much about them. 

I used pattern 619 of Burdastyle for kids (the issue currently available). I think this issue is a pretty good investment, even for boys. There are some seriously cute patterns for girls in it too. I bought it for this raincoat pattern - hopefully it may not be too much of a challenge... 


I really wanted an easy pattern for trousers that I could use again and again so that I could whip one up during the weekend, so that Baby MiH did not have to wear too many trousers with holes. I think there are still a couple of alterations to make to this pattern - but it is quite a good base. I am just wondering which trousers of mine (or Mr MiH) I could use next! 

Did you see the new theme for Le Challenge - DIRECTION. Will you be joining us next month? 

Upcycling for my boys - Part 1 :: SEWING ::

Sunday, 14 June 2015

This project is only part of my entry to this month's Le Challenge. I am still working on the second part - and also the final pictures involving the boys. So you will have to come back tomorrow and the day after to see the whole project. This means, yes, 3 posts in 3 days, I know, amazing considering the minimal activity of late of my blog ...

This month's Le Challenge theme was single... As per usual with loose themes, I did not know how to interpret it until a week before the deadline. You cannot see the whole project, but the idea was to make two items of clothing from one single pair of my trousers. Also it totally fits with my journey towards a more sustainable lifestyle. 


I made first a bloomer for Little Baby MiH, perfect for the summer of course - and very cute with his chubby legs (pictures involving said chubby legs to come in a couple of days). 


I bought my trousers in a charity shop - they were brand new and my size - so potentially they could have been for me. But the style did not fit me. I really liked the stripey fabric but also the feel of it for the summer. So it was time to search the internet and my magazines for some inspiration. 


I found this free pattern (in French) for the bloomer. Mr MiH mentioned that it was quite tricky to print - just in case you want to use it. I did not follow the pattern instructions as it is self-explanatory. I had to cut out 4 pieces because I used upcycled fabric, but the pattern uses only 2 pieces - which makes it the easiest pattern ever. 


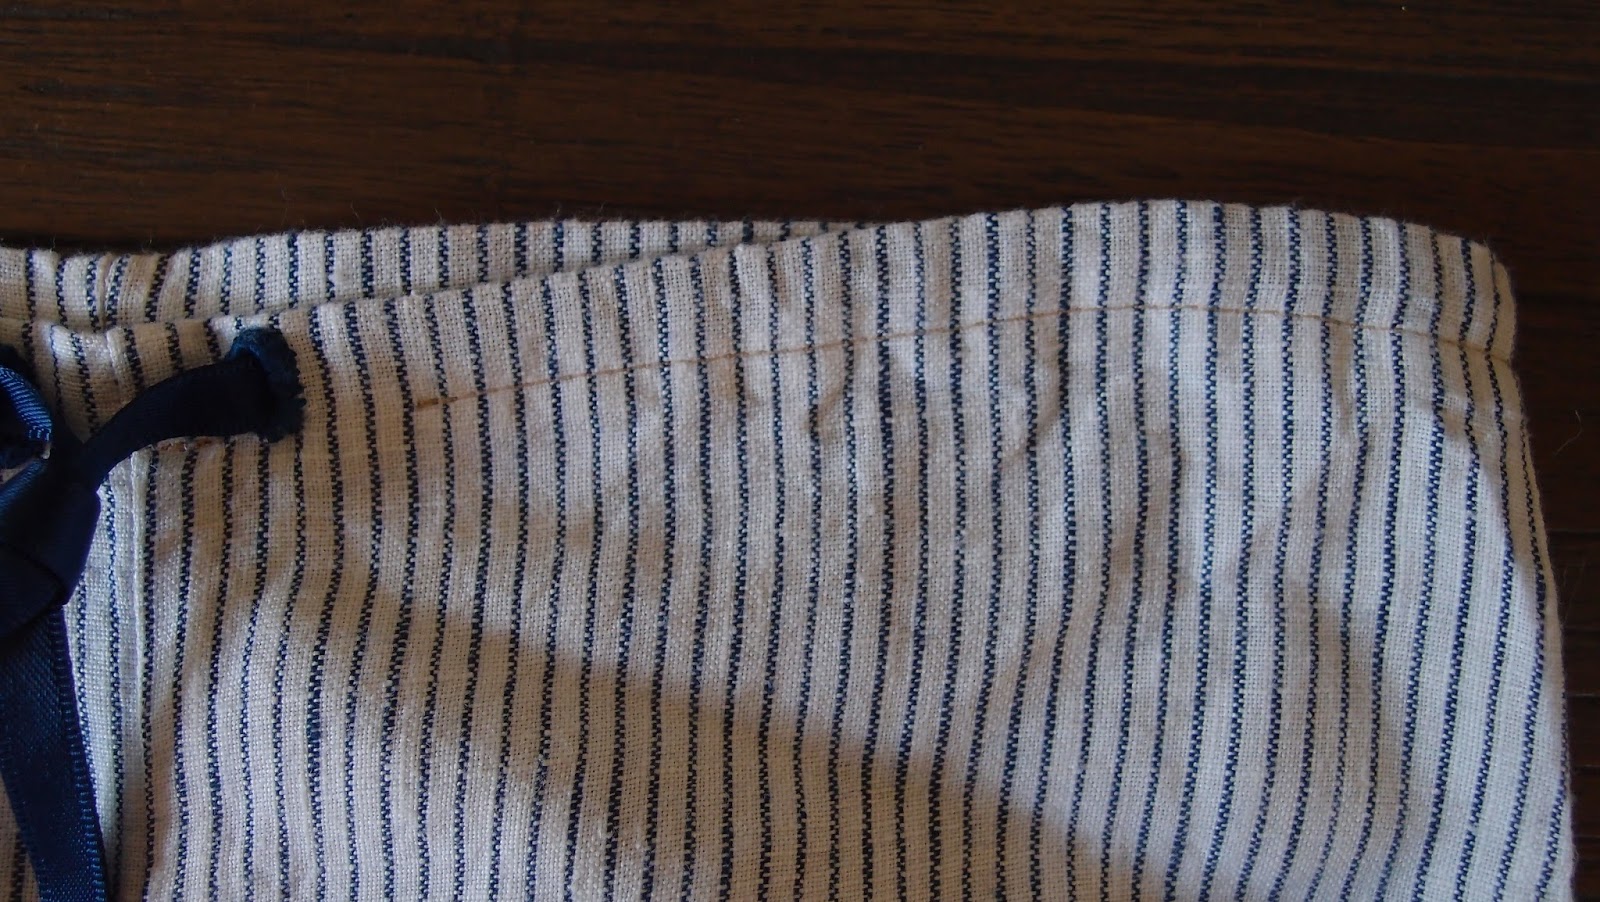
I added a ribbon at the top, as I did not have enough elastic handy - using up that stash of mine. Little Baby MiH is not yet on the move so it is ok for the time being, but I think an elasticated waist would be better when he starts crawling. 


Tomorrow I will show you the second part of the project - trousers for Baby MiH (my first pair of trousers) - so stay tune! 

And check out all the Le Challenge entries over here. 

Tips for stashing less

Sunday, 12 April 2015


Stashing less, stashing better - all of these things are important to me and I thought it was time for me to share a bit my experience so far. I have definitely de-stashed, through selling and some serious review of my stash - and giving away quite a chunk of it. Whether I can stash less though, the jury is still out there but I have tried to put things in place to stash less. 

1. I have no choice - I have a minimum space for my stash.

We have a small house, or cozy for the 4 of us (and that's without the boys having too many things). Mr MiH, bless him, built me a shed/hobby room (yes the whole shed, I know), it is not big but it is my place and I love it. He built shelves, 4 of them - 4 boxes can fit on them - that's your lot. This is where all my yarn and fabric stash will live. At the moment, it is basically one in, one out when it comes to yarn, I have a bit of room for fabric but not much. 

My first tip is not letting the stash take over your rooms, keep it in one place and stick to that limited space for your stash. 

2. Look deep into your stash and don't be lazy

For me the project usually comes first, and then the choice of yarn/fabric. And here lies a massive problem, I already have something in mind, and I find it hard to adapt that vision to my stash. And I buy more fabric/yarn for the project. I am able to say no to Baby MiH when he wants a new toy, but not to me when I want new fabric/yarn for a new project. 

For knitting, I will be making more adaptations to projects to use the yarn I already have. It seems obvious, but it is not to me. I usually try to match the type of yarn to the project yarn. You get obviously the best result like that, but at the same time you look at your stash and find a yarn that you like, make a gauge and work your maths. 

For fabric, you could dye your fabric to suit your dressmaking needs. For quilting projects, I may be using more techniques like small scraps to get the 'general' colour scheme I want. 

My second tip is that you may already have what you need in your stash but not in the form you want it to be, think creatively about using your existing stash - the answer for your next project is probably there. 

3. Don't be tempted

I have deleted all emails offering sales. And it is SO hard, but I cannot be tempted until I have space. It is too easy to be tempted and get fabric/yarn you don't have a project for. 

So my third tip is to stay away from temptation. 

4. Annoying stash - the small batches

My stash is made up of a lot of one skeins. I have just realised that this is really not that great. I am going to knit more socks to use them. They are all pretty skeins so there is no way they are leaving my sight, but I need to make space, so socks we will have. Having kids help of course, so more things for them to come! 

So my fourth tip is to try and stay away from the annoying stash

5. Social media and stash management

I have sold yarn on my blog, I have seen it sold on IG, there are groups on facebook to swap your stash. Make the most of it, you may not need it, but someone else may do.

My fifth tip is to use social media to its full extent - not just for projects but also selling your stash. 

6. One project - one purchase

When my stash will be finally under control (oh the day!) I will (try to) buy materials once I have made an inspiration board, found the pattern and be ready to cut/knit and get on with it. It will come in to be made into something. Cannot wait for this to happen. 

My final tip is to buy only what you need. 


Here are my tips, what are yours? Share them in the comment box, it will help me (and maybe others) a lot. 

MiH x Coco and Vera :: Sewing ::

Friday, 10 April 2015


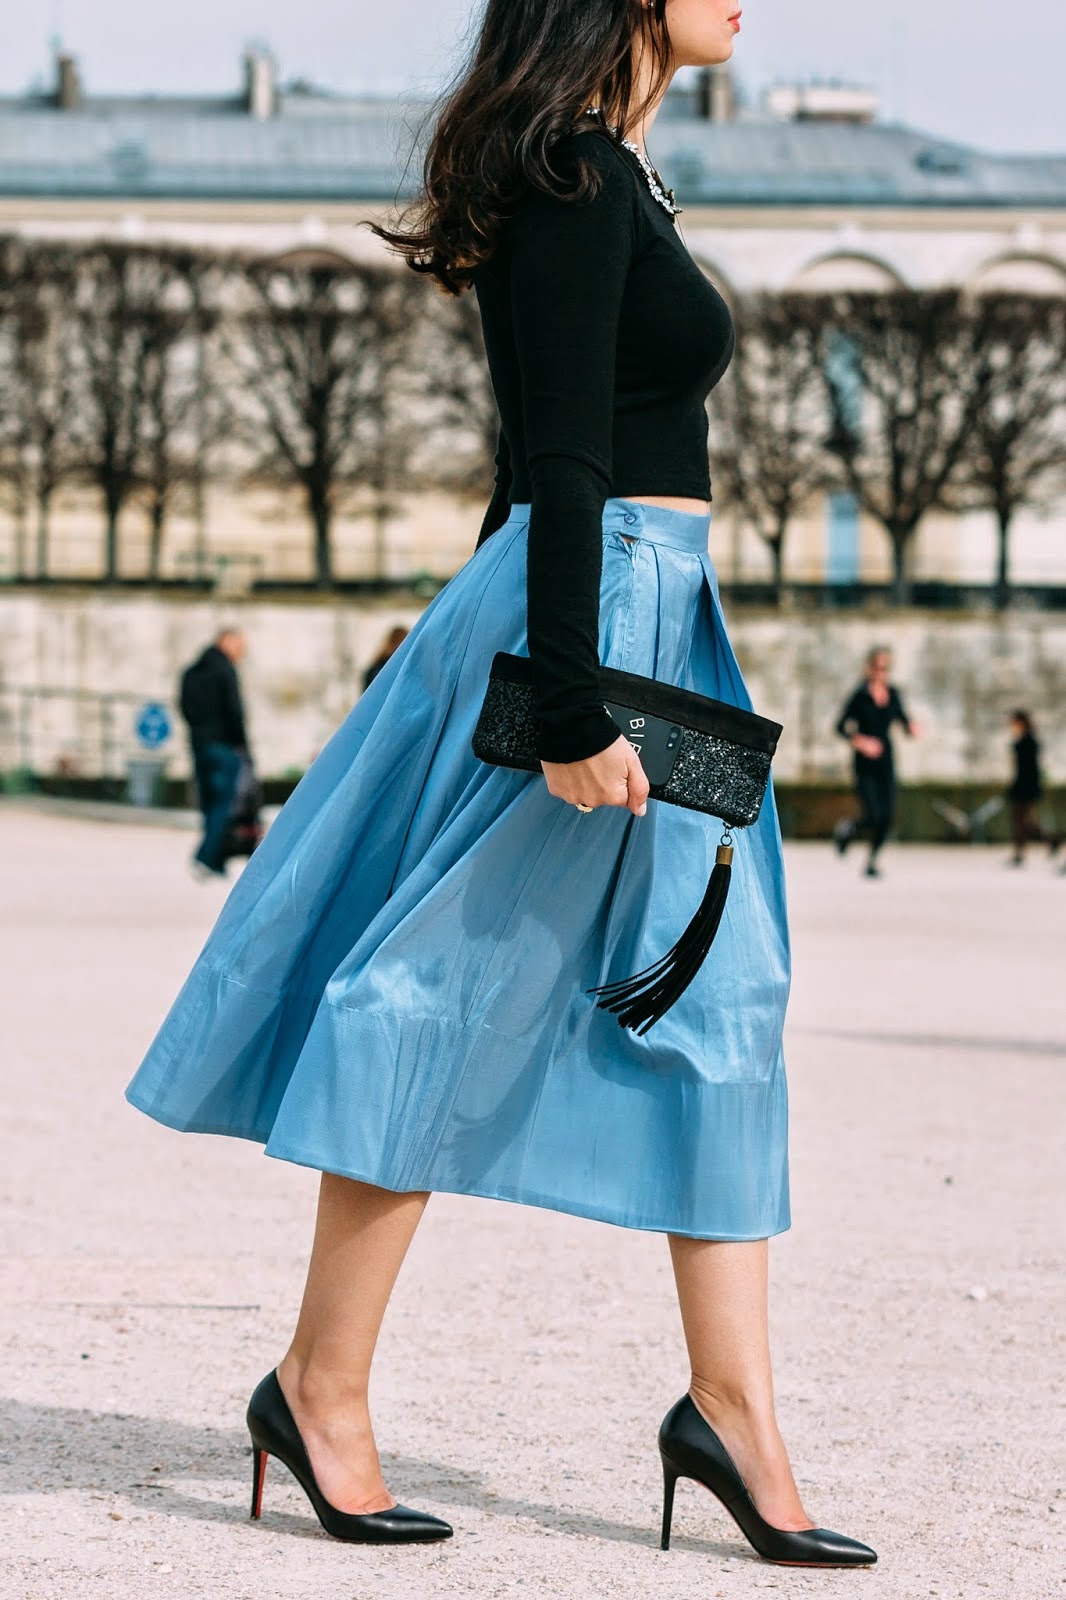
People, I made that skirt.. I know I can hardly believe it myself - I made that skirt, I made that skirt, I made that skirt... And Cee is totally rocking it - because there is no way in a million years I would look that good in it. And she styled in Paris - in Paris, man, can you believe it - and for a proper photoshoot, as if it was for a magazine. Thank you I heart Paris to let me share the pics! 

And the result is quite stunning. I cannot believe it - I think Mr MiH may be sick of me swooning over my own handy work. To be fair I never thought it would look this good! 


You will remember the first Tibi skirt I made for Cee. This one is really similar - same pattern, same fabric (from the same shop but in a different colour of course), same modifications (ie lengthening it). 

I only changed the pleats to make them more like a real Tibi skirt and also added a wider horsehair braid (found here) at the bottom for more effect. Also you will note that it was in the end totally worth matching the fabric to the braid - thankfully I did, phew!


The pictures make me as happy as I first had a glimpse at them on instagram. I may leave you, and have my happy dance in the living room!