Showing posts with label cross-stitching. Show all posts

Vintage Inspired pincushion | Tutorial |

Monday, 14 December 2015


Happy Monday everyone! I hope you all had a great weekend. Birthday celebrations were in full swing at ours - it is Baby MiH's third birthday (today) and it was party (and baking) time (this weekend)! I still managed to get a bit of cross-stitching done, and finished my new vintage inspired pincushion - and write a tutorial for you (if you are looking for quick Christmas presents for your sewing friends)! 

The pincushion was inspired by Libby's one I have seen featured a couple of times on her facebook feed. It looks like hers was made of actual vintage embroidered cloth, which I did not have handy. So I made it 'vintage' by cross-stitching on the fabric and placing it on the side rather than neatly in the middle. I used the lovely ethical fabric and buttons I got in my Offset Warehouse Mystery Sewing Box - I love the fabric I got. 

To make your own pincushion, you will need:

  • Some fabric (I used some 'new fabric' but feel free to use some scraps you might have)
  • If you fancy adding some embroidery, choose some matching embroidery thread - but it is optional
  • Some waste canvas for the embroidery
  • Polyester soft toy filling
  • Some matching thread to close the pincushion.  
  • Make a circle template for your pincushion - I used a vase to make mine. 


1. Place the waste canvas on your fabric. I put it in the middle so that I had enough fabric on either side for the pincushion.

2. Use this method for the waste canvas and cross-stitching. I went a bit free style with mine - so let your creativity flow. The only requirement is that it covers some of the pincushion. 


3. Place your pincushion template on the folded fabric, placing the embroidery side ways (if you are going for a more vintage look)


4. Sew around the template, right sides together - remember to leave an opening to fill the pincushion 


5. Turn your piece right sides out. Finger press the seams open. Then stuff. Use a lot of small bits to stuff your cushion. Push the stuffing up against the inner seams. You want the stuffing to be very full but not too firm. Sew the opening closed.

6. Find the exact center of your pincushion on each side and mark with a pencil or pen. If you are off center, your finished pincushion will have uneven sized sections, so take your time.

Sew a few stitches with your thread to create a firm anchor. 

Create each section by bringing the thread up from the middle, around the outer edge and then inserting the needle back into the center. Give the thread a firm tug to create the pillow effect. It may be difficult to work the needle through the center. I made 8 sections for this pincushion, up to you how many sections you want (4,6,8, more?). 


7. Add your button, I did also add a bit of fabric underneath to hide the middle. 


 And here you have it, a beautiful new pincushion, ready for use within an hour (without the cross-stitching part). 

This is my challenge entry for 'space'.. Because of the space in the middle of my cross-stitching pattern. For better interpretation of this month's theme, and a chance to enter our giveaway, check out the projects here

I love seeing your projects using my tutorials, so don't forget to tag me if you make one (on IG, twitter or facebook). 

Directions :: Embroidery ::

Tuesday, 14 July 2015


Le challenge has come round again, and here is my entry for the theme 'direction', and my new Iphone cover. I have been wanting a new one for a while - a more summery one - and usually I try to use le challenge to just get things done. 

Let's face it, this is not the hardest embroidery pattern, but it feels good to finish something - no matter how simple it was. It is so satisfying, especially when you end up seeing your make every day in your bag. 


I found the Iphone cover on Ebay (make sure you take the right one for your phone). The pattern I used was inspired by the Purl Soho one (but they don't use the same cover), and the thread is naturally dyed by the Outside Dyers - who are based in the UK. 


I wanted to share on the side another change of direction - I am more and more inspired by the Paleo diet - although with mixed success in terms of recipe (especially for cakes). I hope I will be able to share more on this on the blog. I know some of you are also looking at healthier ways of eating, so I will be keen to share experience (especially with the kids). 

You can find all the other le challenge entries here.  

Mr Moustache :: Cross-stitching ::

Wednesday, 25 February 2015


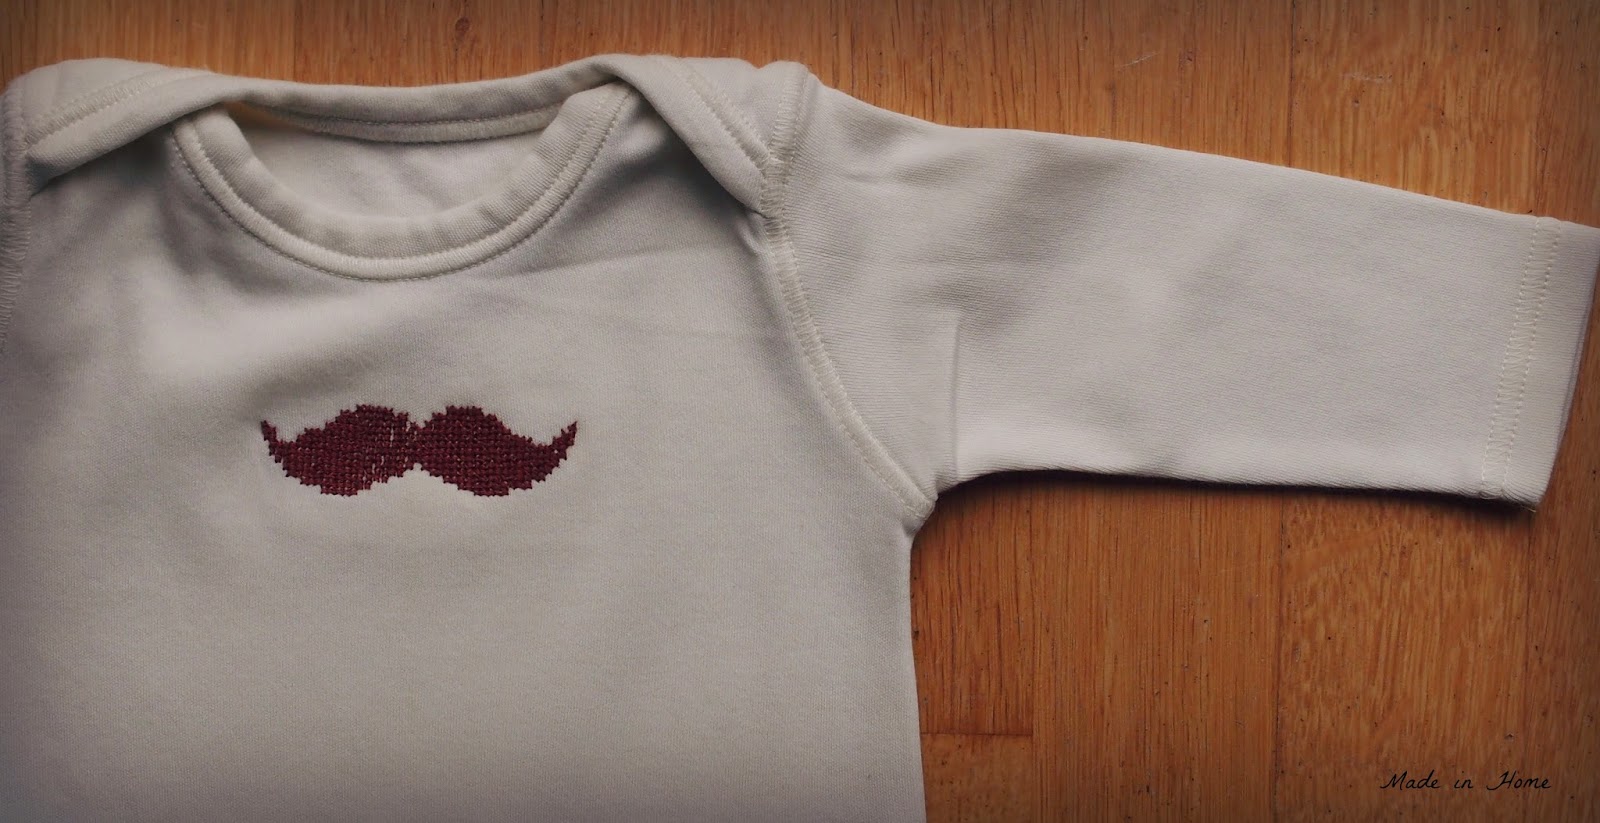
I finally managed to take picture of Little Baby MiH in his customised vest top - I had talked about the customisation process here (a bit of time ago now). He has been too small to wear it until now - but he is wearing it all the time now that he is able to. 


I bought a set of organic vests for Little Baby MiH before he was born, and only customised one of them. If you have a winter baby, vests are not something you get to see often. It is probably best to customise the summer ones - in case you fancy making some. 


It does make the perfect gift though - a vest is really useful, but a bit boring, so customising it adds a real personal touch - I am thinking initials to be super fancy. 

I bought the organic vests from BabiPur, the waste canvas 
from the Needle Craft Shop and use some DMC thread in brown. 
Here is my Pinterest board for embroidery pattern inspiration. 


I took a few pictures of Little Baby MiH to get these three (a mere 140...), hope you enjoyed them! 

Kicca :: Cross-stitching ::

Tuesday, 10 February 2015


I love cross-stitching. It is not necessary the first craft I pick up - usually it is knitting - but it makes me so happy. I also finally managed to make something from one of the latest craft books I bought. I have not changed anything - it is totally my style. This little make (now finished) should appear soon on the blog. Stay tune.

Christmas 2014

Friday, 26 December 2014


I managed to finish the one handmade present on time, i.e. only an hour before presents were given out. I am really happy I decided to only make one present. Because of the size of the box I used, I had to make 9 ornaments in the end. It works as a set - with 3 different patterns. I did not use white thread but a grey-ish one, so that my Mum is able to use the ornaments all year long. I used red felt for the backing (I had some in my stash that was calling to be used). 

All my cross-sttiched inspiration can be found here

Mr Random.org also decided that no 12, Lise. I sent you an email. Thank you all for participating. 


Hope you all had a great Christmas!!

The Pink Ethical Tova | A Finish {Dressmaking}

Saturday, 1 November 2014


I finished the pink Tova more than a month ago - but I was waiting for the pictures from our family photoshoot to arrive to share the result with you. There are a few more pictures in this post than the usual but if you have a very talented photographer taking pics - you want to make the most of it. 

You may notice that this Tova is pink - and I hate wearing pink. I am going to put it down to being pregnant and wanted something new. The (very loose) inspiration for this top is this shirt pinned on my style board on Pinterest


The Tova pattern is a great maternity wear pattern if you modify it slightly. All the modifications were explained here; I added another couple of inches at the bottom for more comfort (I was 7 months + pregnant at the time of the pictures).  


The embroidery pattern was larger to start with - but when I started cross-stitching it looked really weird, so I halved my pattern. I have it down somewhere if anyone is interested. It is not that complicated - except that I was for the whole time worried the two sides would not match. 


Of course I used the waste canvas method - I did say yesterday that I was cross-stitching everything! 


The fabric is my first purchase from the Offset Warehouse - an online fabric shop that stocks a wide range of ethical fabrics, trims, haberdashery and paints - and is based in the UK. 

I wanted a lightweight fabric and found this pink handwoven chambray (at £7/m it is quite good value as well). It was great to work with, and it is lovely to wear. The only thing is that I tend to wear this Tova a lot - and because it is hand woven, the weave is not as tight as for other fabrics - and it shows at the underarm seams. But it is not major. 


If you would like to buy ethical fabrics in the UK - this is a great place to start - for dressmaking of course.. 


I am so please with both the shirt and the pictures! My friend Debs Ivelja is a great photographer (worth checking out her website/facebook page). And you get a little snippet of where we live too! 

Also did you read Mr X Stitch post on Le Challenge this month - and his views on arts vs craft, even if you don't want to join Le Challenge it is worth a read. The theme this month is x and the winner will win a $25 gift certificate to the Fat Quarter Shop and your choice of 25 close ended zips from Rickety Rose Crafts! 

PS: I love Baby MiH top, it is ethically made by Tootsa McGinty

Halloween T-shirt | A finish {Sewing and Cross-Stitching}

Friday, 31 October 2014


HAPPY HALLOWEEN EVERYONE! 


Halloween is a bit weird for me - we never celebrated it at my house when I was younger, so I don't feel that much attachment to it. Of course, this is all going to change now that I have children - and in fact it has changed in France too - everyone is dressing up now! 

This is my excuse for not making a full pumpkin outfit for Baby MiH - but going for something a bit more stylish (that he will be able to wear again). To be fair, this is the only year I will be able to do this, I am sure that next year he will be asking me for an outfit. He is already asking me for specific shoe colours (that we don't have, of course!)


Back to this project, I have spent all day yesterday making it the T-shirt and the cross-stitching. The T-shirt was quite quick to put together - the cross-stitching was a real time waster, but that is because I went for a much bigger pattern than I expected (I wanted a 'happy' ghost...). 


About the patterns: 

- The Tshirt pattern is Api by Blousette Rose. It is in French BUT with 4 pieces to sew together (and in fact a lack of precise instructions) I don't think you can really get it wrong. I made the pattern in the smallest size (2 yrs) which works perfectly for my 22 months-old. The jersey fabric is organic - and this is why I made one - from Ray-Stitch, and it is on sale! It is really easy to work with. 

- The Halloween cross-stitching patterns are from my Pinterest embroidery board. I used a cream thread rather than white to make it just a bit more ghostly. I used the waste canvas method to add the cross-stitching (I am a fan, cannot stop cross-stitching everything!). 


I am very pleased with the result - even though it meant cutting some sleep time last night (I did not IG at 2 in the morning when it was finished as I thought it might be a bit sad). Baby MiH was happy to wear it, which is always a good sign. I did not have that much luck with his ghost mask, oh well... He is off to nursery now, and there should be some snaps of him with all his little friends. 


So I managed to make a cute outfit - in one day - that did not scare Baby MiH (he has now understood the concept of fear...)! I can now relax!

Hope you are all having a great Halloween! 

Christmas posts will resume as of next week... 

Cross-stitching patterns | Christmas 2014

Friday, 24 October 2014


I finished two patterns for my first Christmas ornaments and I have now cut the burlap to size - which looks a bit tidier. I have not chosen the backing fabric yet nor how I will hang them, but at least I have an idea of size (especially if I start going for another pattern). 


Both patterns were cross-stitched on burlap fabric (I have a big piece of fabric in my stash, but you can try Ebay) - I think the red thread is my favourite. I used 3 strands of thread in each case - but the red looks fuller somehow. Or I may be biased towards that pattern - it is definitely my favourite out of the two. 

I am not a cross-stitched expert and I have not got any software to transcribe the design onto an electronic pattern sheet, but I reckon you should be able to work it out from the pictures (and do a hand-written pattern as I tend to do). However, if you know any free pattern making software - let me know, and I will be happy to transcribe everything! 


I am really happy with my progress - at this stage I am not sure whether to add another pattern and another thread to my ornaments - or just keep it at two colours, two patterns... I went through my Embroidery Pinterest Board again and I saw so many patterns from last year that I like that I may just have to add another pattern

Slow Start | Christmas 2014

Friday, 17 October 2014


I made a very slow start on Christmas decorations - well singular decoration in fact. I will be using this template (you can find more of my Christmas embroidery inspiration here) on burlap with cream DMC thread. I am using 3 strands at the same time to make it stand out a bit on the burlap - I may move to red thread next. 

I do love working on Christmas stuff though. 

Serial cross-stitcher | Soluble versus Waste canvas {Embroidery}

Sunday, 12 October 2014


It took me a while to start cross-stitching outside the comfort zone of the ready-made canvases - but once I started there was no stopping me! I have now cross-stitched felt (you can see how with my boxy pouch tutorial here); a baby vest; and a new top! And I am already thinking of the next project - probably some Christmas cross-stitching on random pieces of fabric or felt I reckon. 

I may be a serial cross-stitcher but you can be too - thanks to the wonders of soluble canvas or waste canvas. I used both (soluble canvas for the felt pouch and waste canvas for the tops) and both techniques work. 

I like the soluble canvas method a lot - it is really easy to cross-stitch, it is really easy to get rid of (as in put it into water and leave it to be). However it is quite expensive - for the square you get (you should have seen my face when I opened the packaging) - and it comes only in the one size (from what I could find), so not big project allowed. 


The waste canvas method is a bit more cumbersome (I bought mine here). First of all you have to work out why the hell there are so many holes in the canvas.


You are supposed to cross-stitch through the little holes. It was easier with my top because I did it over 2 squares, it does not look as consistent on the baby vest top though. 


Then, there is the issue of getting rid of the canvas - it takes a bit of time (no leaving it in the water and wait for it to do its thing!).

Yes, people you have to take each strand off, one by one - hours of fun, right-there (ok it is actually not that long, but still a bit tedious). You are supposed to do it with tweezers, and yes it is easier to do it with tweezers. You have to be careful not to pull too much, otherwise the cross-stitching may move. Arggh!


However it is cheaper and you can buy the waste canvas by the metre, and it does do the job perfectly well. For the baby vest top, there are a couple of more steps to take, you have to add muslin fabric behind so that the jersey does not get distorted - I followed this tutorial.  

So what will you cross-stitch next? 

Cross-stitched Wrapping Paper | Tutorial

Friday, 20 December 2013

Or how to use your kraft paper.. I usually use the paper for sending parcels, but I had a lot spare from that one roll. So what do you do with it? We all know I love cross-stitching on different medium, but had not tried on kraft paper. But it is so obvious! What a great way to make your parcels look pretty, and personalise then; and add some (more) Christmas decoration in your house. 


Here is a quick tutorial. You will need kraft paper; a needle and some thread (I used the Anchor Mercer Crochet Thread No 10). 

Fold the paper as if you would wrap your present
Mark your cross-stitch pattern on squared paper - cut it out and stick with
masking tape on the area you want the motif to be. 
Mark the pattern with a needle

To make sure all the holes have been punched, I put it against the light
Ready to cross-stitched
Thread is hold double
And here it is...
in the corner of the parcel..
It took me about an hour to make one - I got the cross-stitched pattern wrong first. A bit time-consuming, but it is too pretty not to do it! And of course this is a Christmas themed version, but it could be done for any other occasion! How do you personalise your presents?