Showing posts with label le challenge. Show all posts

Directions :: Embroidery ::

Tuesday, 14 July 2015


Le challenge has come round again, and here is my entry for the theme 'direction', and my new Iphone cover. I have been wanting a new one for a while - a more summery one - and usually I try to use le challenge to just get things done. 

Let's face it, this is not the hardest embroidery pattern, but it feels good to finish something - no matter how simple it was. It is so satisfying, especially when you end up seeing your make every day in your bag. 


I found the Iphone cover on Ebay (make sure you take the right one for your phone). The pattern I used was inspired by the Purl Soho one (but they don't use the same cover), and the thread is naturally dyed by the Outside Dyers - who are based in the UK. 


I wanted to share on the side another change of direction - I am more and more inspired by the Paleo diet - although with mixed success in terms of recipe (especially for cakes). I hope I will be able to share more on this on the blog. I know some of you are also looking at healthier ways of eating, so I will be keen to share experience (especially with the kids). 

You can find all the other le challenge entries here.  

Upcycling for my boys - Part 1 :: SEWING ::

Sunday, 14 June 2015

This project is only part of my entry to this month's Le Challenge. I am still working on the second part - and also the final pictures involving the boys. So you will have to come back tomorrow and the day after to see the whole project. This means, yes, 3 posts in 3 days, I know, amazing considering the minimal activity of late of my blog ...

This month's Le Challenge theme was single... As per usual with loose themes, I did not know how to interpret it until a week before the deadline. You cannot see the whole project, but the idea was to make two items of clothing from one single pair of my trousers. Also it totally fits with my journey towards a more sustainable lifestyle. 


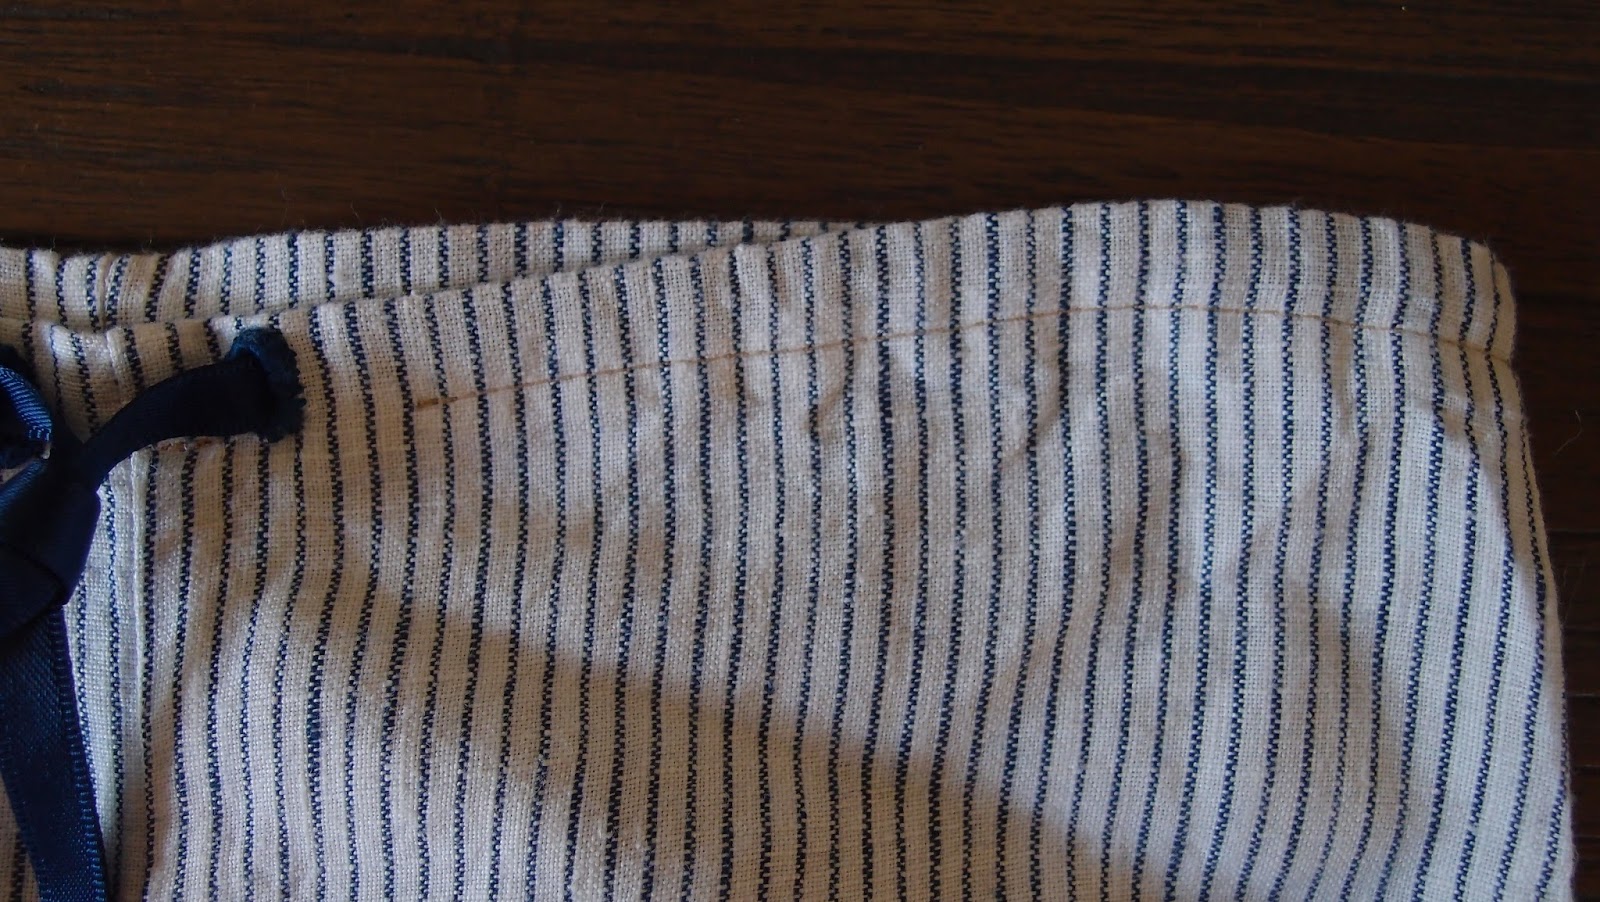
I made first a bloomer for Little Baby MiH, perfect for the summer of course - and very cute with his chubby legs (pictures involving said chubby legs to come in a couple of days). 


I bought my trousers in a charity shop - they were brand new and my size - so potentially they could have been for me. But the style did not fit me. I really liked the stripey fabric but also the feel of it for the summer. So it was time to search the internet and my magazines for some inspiration. 


I found this free pattern (in French) for the bloomer. Mr MiH mentioned that it was quite tricky to print - just in case you want to use it. I did not follow the pattern instructions as it is self-explanatory. I had to cut out 4 pieces because I used upcycled fabric, but the pattern uses only 2 pieces - which makes it the easiest pattern ever. 


I added a ribbon at the top, as I did not have enough elastic handy - using up that stash of mine. Little Baby MiH is not yet on the move so it is ok for the time being, but I think an elasticated waist would be better when he starts crawling. 


Tomorrow I will show you the second part of the project - trousers for Baby MiH (my first pair of trousers) - so stay tune! 

And check out all the Le Challenge entries over here. 

New Felt Ipad Cover :: Embroidery ::

Tuesday, 14 April 2015


For a previous le challenge I made an Ipad cover that I really liked using hama beads. Baby MiH really enjoyed the hama beads - and decided that it was much better off my Ipad cover, and in his toy box. This Ipad cover is no more... But I will not be defeated by a 2-year old, and finally made a new cover - stronger from my first cover experience. 


This one is using embroidery - nothing that can be removed too easily (hopefully). The pattern is from my favourite craft book (it is the only book I want to make all the patterns from!). I have already talked about it here. The embroidery resembles a bit Christian traditional symbolism - oh, hold on, 'tradition' is the theme for le challenge - did you think I forgot about the .. interesting.. theme we chose? 

I tried to take a close up picture to show the actual stitching. This is not your regular cross-stitching, it looks a bit braided. It took me a while to get my head round it (because you have to follow the direction the pattern sets as well). But it definitely adds another dimension to the stitching, and also pops up a bit (not sure I needed this considering the colour scheme I chose). The stitch is called Tvistsom - you can read more about it here. It is a traditional Scandinavian stitch - and in traditional there is ... 'tradition', I am SO into this theme! 


It makes a nice change to cross-stitching, I think the overall effect is softer (a mix of the easiness of cross-stitching and the softer effect of embroidery) - but you really have to look up close to understand what stitching is used.  


The felt I used this time is much stronger than the previous one (probably double the thickness). I bought it for a Christmas project that was never to be. I love working with felt - because there is no seam to worry about. It is brilliant. It looks like I quilted the border a bit - it was all planned, and not at all because I had left too much seam allowance... You can find similar felt here. The yarn I used is the same as for the Settler shawl.  

Because of the thickness of the felt I had to use a pointy needle rather than an embroidery one. And my fingers are still remembering it. I am just warning you - embroidery is a dangerous business. And of course I am not that good at making perfect stitches, so I used waste canvas to add the pattern. I love waste canvas... 


I am always late for my le challenge project - but somehow always manage to make something I really wanted/needed to make for some time. It is a great way to get things moving for me. If you would like to join us for this le challenge or future le challenge - all entries and themes are here

Love/Hate [Le Challenge] :: Sewing ::

Saturday, 14 February 2015


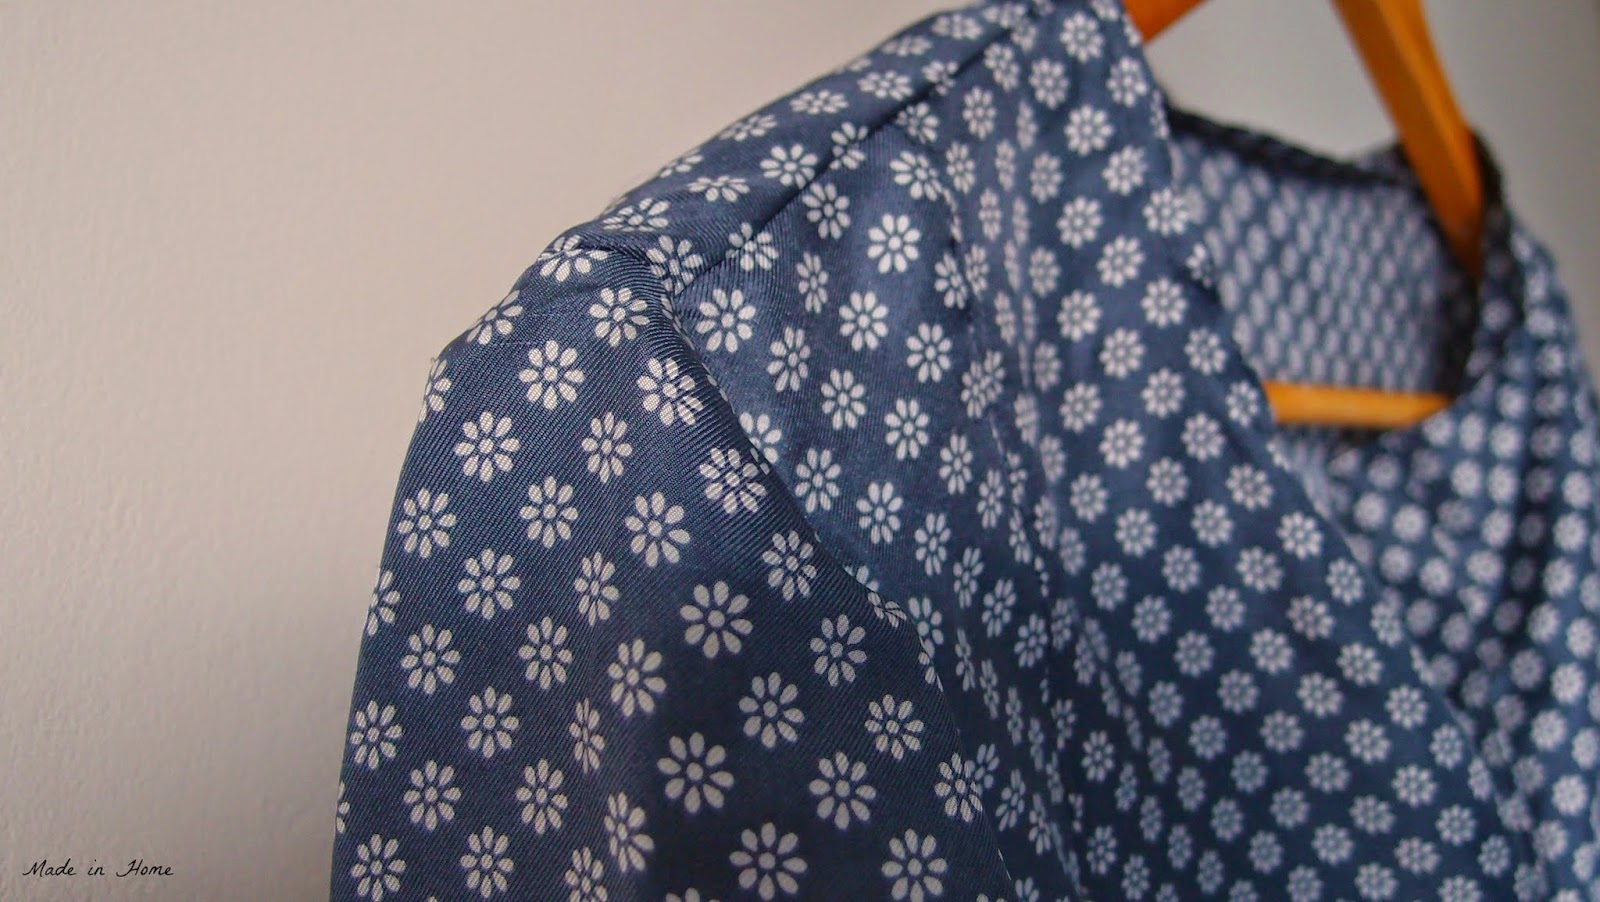
Le Challenge is back... and as per usual, I made it just...and in fact this post is really late.. But dots was the theme, and dots I give you! Let's start by the only thing that comes to my mind when I think about this project - this fabric did my head in, but I love this top. It was so slippery, I just did not control any of the sewing process - ok maybe I did a bit because it does look like the Tova it is meant to be.


Not sure I have a lot to say, except that this is my favourite make ever. It a Tova but without the collar, it is much more my style. I applied a light fusible interfacing to the placket, and finished with a bias tape (although I really need to redo this for a better finish). I also shortened the top a bit. It is a tad on the small side at the moment (to encourage me to diet better..?!)


This fabric has been in my stash for at least a couple of years, and I have no idea where I got it from. I am surprised I actually like it on me, but that blue/grey really works for me - I suppose the dots/flowers add interest? 


Here you are I hated the process, but love the result - the perfect combination for Valentine's Day?!

Does 'dots' inspire you? Link in to le challenge here for a chance to win a voucher to the Fat Quarter Shop. 

Handmade Wrapping Paper | Le Challenge {Ink}

Sunday, 14 December 2014


I am very surprised that I have anything to show you for this le challenge. It is a very quick project - which seems to be a theme on this blog at the moment, but still a useful project. My Mum's Christmas present requires a big box - I had a box that was perfect but it did not look Christmas-y, so what to do... Get some Christmas stamps, kraft paper, silver ink - and stamp, stamp, stamp... And then cover the box. Easy, peasy - and pretty special. 


I used:

- some kraft paper (bought at WH Smith)
- Some stamps bought from the English stamp company
- ink (ColorBox Ink Pad)


I did make this an activity with Baby MiH (although his final paper did not make it on the box)- he did enjoy it, for half an hour or so. But then moved on to licking the stamp.. not ideal. However the ink pad I used washes very easily from toddler fingers and surfaces - which is great news! 

I wanted to show you the box full of my Mum's Christmas present, but I did not manage to finish it. And now that she is here for the weekend, I may not be able to progress much with it. I will try to share it later. 


For all the other 'ink' projects, head to le challenge - and if you enter a project (big or small), you get a chance to win a $25 voucher at the Fat Quarter Shop! 

My September here and elsewhere

Tuesday, 30 September 2014

I have not done one of these reviews for a while - but I hope to make them more regularly. So here is what caught my eye, or has suddenly arrived in my house this month. 

- Thanks to Libby, I have finally understood the point of Podcast (I have never really been into them) - well at least one in particular, the weekly podcast by Tara Swiger #exploreyourenthusiasm. The last one is so inspirational. I usually listen to it whilst writing a boring report for work. It is free, and it is amazing, check it out. 

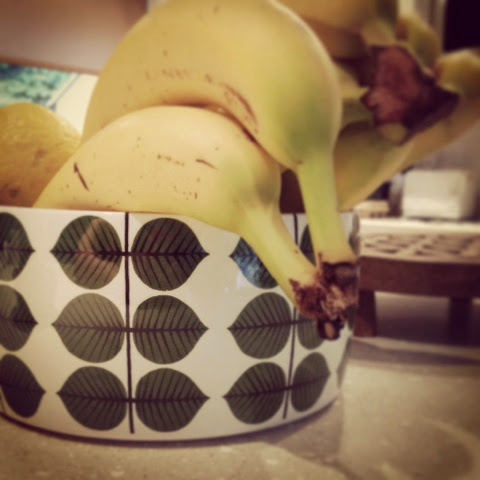
- I have always been interested in 60s/70s design, and we added to our little home collection this week - thanks to Ebay - with this Stig Lindberg fruit bowl that sits in the middle of our kitchen island. I never thought a fruit bowl could make me so happy. 


- I am not sure whether any of you submitted a tutorial to craftgawker - basically a site full of free tutoriasl. I found the process of submitting quite difficult if I am honest. You need your pictures to be perfect, think about the composition , light etc. It is of course a great way to test your photographic skills, but it can be really depressing when a project keeps being rejected, not because of the quality of the tutorial but because of the picture (it has happen a lot in the past to me) - check out this other blogger experience. Two of my projects made it through this month, whoohoo, the embroidered felt boxy pouch and the toddler beanie hat. One of the tutorials have been referred on another blog today - amazing stuff. 

- I love these geometric ceramics 

- Twelve free cool fonts, yes please. 

- This version of the Brigitte Tee has totally inspired me, I can probably alter it to make it into a pregnancy top, using this tutorial

- I found a new ethical fabric shop, the Offset Warehouse, and bought some fabric from them that has already made into a top, but more on this in October. Here is a sneak peek. 


- I have made a couple of minor changes to the editing of blog - so you can now pin easily all my pictures - I used this tutorial to make it happen - and made my pictures appear the same width but retain proportions - tutorial here.

- Finally I am starting my Le Challenge project, and I have 'lion' on my mind... 

Embroidered Boxy Pouch | Le Challenge

Sunday, 14 September 2014

*For your last chance to win one yard of organic cotton fabric dyed naturally
please make sure you enter the giveaway here*

When I showed my finished le challenge project this month, Mr MiH said, oh look you made another boxy pouch. Yes, I did dear, but this one is special. I added the embroidery, it is felt, can't you see? 

So yes, this is my third boxy pouch - following the steps (but not measurements) of the Kelbysews tutorial - adapted to felt. And it is my le Challenge entry (the theme is era - and the interlining fabric is one that I got from Mary's vintage sheet swap). 


To make your own embroidered boxy pouch, you will need:

- 2 pieces of embroidered felt (tutorial just below) 
       I bought this one measuring 30 cm by 45cm
- 2 pieces of medium-weight interfacing of the same dimensions (30cm by 45 cm)
- 2 pieces of coordinated fabric of the same dimensions (30cm by 45 cm)
- 2 pieces of felt measuring 1.5' x 5' for the side tabs
- a zip which fits with the longest side of the the felt pieces - mine is 14'
- matching thread 


To add the embroidery on felt (or any other fabric), I used some DMC soluble canvas (which is actually quite expensive for what you get, so I am now trying to use waste canvas - I will let you know how I get on). 

To make this embroidery (but you can make whatever pattern you fancy of course) - I marked the middle of the felt pieces.  


Baste the soluble canvas cut to size (making that little square you get last!) in place. It is great way to keep it place, it is a bit annoying to unpick after the cross-stitching is done, so may be better to go for longer stitches. 


Do it on both sides. 

And let the cross-stitching begin. You use the soluble canvas as a normal canvas. I used three threads of DMC thread, I chose (following an IG debate) to go for matching the thread to the vintage interlining fabric. 


Follow the instructions to dissolve the soluble canvas - it works! Et voila! You are ready to make your pouch! You  may find the felt has shrunk a bit, so look check out the pieces again to make sure they have the same size throughout the project. 

The main difference between my pouch and the Kelbysews one is that with felt you don't need to worry about the fabric edges and you leave them showing. It is supposed t make it easier to match the embroidery - but that did not work out as well for me (maybe next time). 


So you place the raw edge of the felt fabric interfaced next to the zip opening, and the interlining as you would normally on a boxy pouch. 


I like to baste everything before sewing with a zip - but this is a personal choice. 


Time to sew the zip into place (easier to open the zip to make neater ends). 


Press and you should end up with something like this (this is the inside)


Sew the two pieces together (the bottom of your pouch) - as you can see I had to make a neater edge. 


You then carry on with the pouch like recommended on the Kelbysews tutorial. 


Finally you have a brand new fancy boxy pouch! 


I love my boxy pouches, but this one is much boxier - because of the sturdiness of the felt I suppose and probably looks like what I had in mind when I started making boxy pouches. I suppose you could adapt the interfacing according to what you need/want. 

For all the other Era entries, go to Le Challenge - the link up party is now open!

Baby Boom | Red Book Cover Tutorial

Friday, 12 September 2014

*For a chance to win one yard of organic cotton fabric dyed naturally
please make sure you enter the giveaway here*

You may remember that I had made a red book cover for Baby MiH (for my non-UK readers the 'red book' is a health book). This has a very specific size which, of course, does not fit in any small handbags, and is not that attractive (think pastic-y cover). The cover I made for Baby MiH, is the one item I use all the time, his actual red book cover has not seen the light of day - but also the one that has received the most (positive) comments from randoms (well his doctor and nurses).

So you all know I am pregnant, what you might not be aware of is that a lot of my friends are also pregnant, and it is all happening right now - literally. And as I am destashing, this is the perfect opportunity to make the most of all the fabrics I have - and finally write down the tutorial - and be able to have handmade presents ready for my friends. 


I already made 3 and I have another 2 to make (for the time being)...


Like the first time, I adapted Bloom's journal cover tutorial to the size of the red book. The difference this time is that I actually took some notes (because I may be making many of those in the future).

You will need: 
  • Three different fabrics (I usually use a solid colour and a pattern fabric for the outside, and a third matching one for the interlining - but this is totally a personal choice). 
  • Lightweight fusible Pellon
  • Enough fusible web for the cross 
  • Matching thread


To make this red book cover you will need to cut:

- From fabric A, two pieces at the following dimensions: 20.5' x 6.75' and 6' x 6.75', and the cross (made from a 2'x2' square)
- From fabric B, one piece measuring 6' x 6.75'
- From the interlining fabric (fabric C), one piece measuring 10' x 6.75' 
- From the Pellon, one long piece measuring 31' x 6.25' 

With the fusible side of the Pellon facing upwards, press the smallest piece cut from fabric A on the right hand-side. Beware of not going over the fabric and onto the pellon. 

Pin the piece from fabric B, right sides facing and stitch using a 1/4' seam allowance.


Flip the piece back across the Pellon and press. (From the back, your fabric should overhang the Pellon by 0.25". This avoids bulk in the seam later).

Repeat this step with the larger rectangle of fabric A, stitching it to the left side of fabric B. 


Cut your cross out of your fusible web and press it onto fabric A. Cut the cross out. I press the cross 0.5' from the top and left-hand side of fabric B (after being stitched or 0.75' before being stitched on the Pellon).


Using a matching thread, I put my sewing machine on its blanket stitch setting, and stitched around the cross. It is a bit funny to go round the cross, so try first on scrap fabric. 

You can topstitch rows of straight stitching - depending the look you are going for. 


You have now finished the exterior of the cover, time, to look after the inside.

Turn the raw, short ends of the rectangle under by 0.25" and topstitch. 


With the right side of your journal cover facing upwards, turn each of the short ends in by 6.5'' and pin.

Pin in place the piece of fabric C over the journal cover, matching centres. If fabric C is patterned, right sides should be facing. Stitch the top and bottom seam using a 0.25" seam allowance. 


You should now be able to turn the entire journal cover in the right way & press. 


And the inside could look something like this:


So yes this tutorial is very specific to the red book cover, but it gives you an alternative to Bloom's A5 book cover tutorial, and may inspire you to adapt this tutorial to another book (or health book) you use all the time. 

Let me know if you have any questions. I will probably be at my machine making a few more anyway. 

On the other note, le Challenge is resuming on Sunday after the summer break - this month's theme is ERA (and yes I could have entered that cover using teddy bears vintage fabric). Here is a sneak peek of mine. 


Don't forget to link in your project for a chance to win a $25 gift certificate to the Fat Quarter Shop as well as a lovely bundle of 10 FQs from Mary Emmens's shop!