Showing posts with label texture. Show all posts

The Double Moss Stitch Cardigan :: Knitting ::

Monday, 16 November 2015

More on my embroidery here
Happy Monday everyone! Well, isn't it hard to take decent pictures these days. Natural light is quite a precious commodity between the dark hours and the rain. I managed to snap some pictures of my finished cardigan, and I can now tell you how much I love it (now that it has pockets). It is my usual style, an easy to wear oversized cardigan.

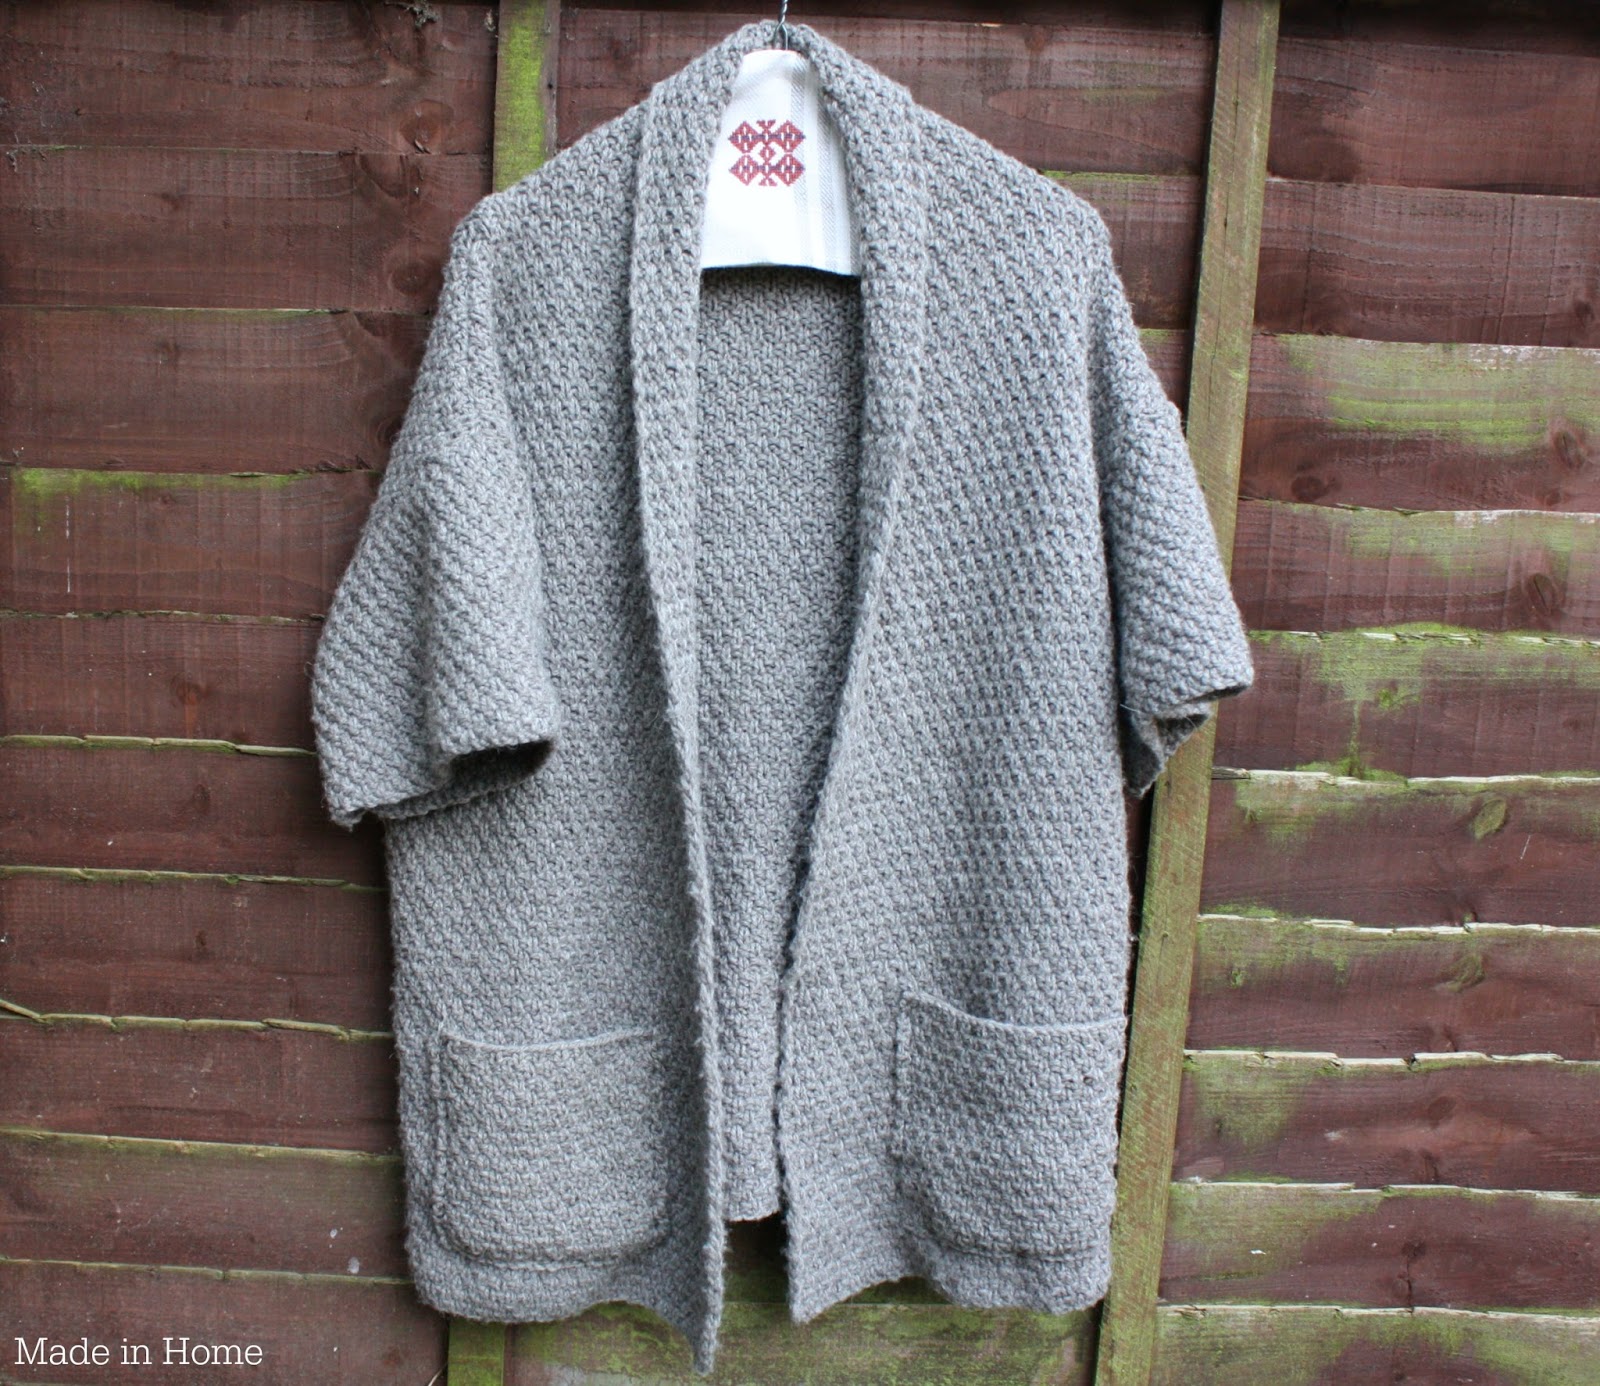
I was really worried about the construction of the cardigan. It is not knitted in the round, - you have to sew the pieces together. You would think that because I sew it would be quite logical that this construction appeals to me, well it does not. I actually like knitting in the round. However after this cardigan I may be not so opposed to knit pieces and sew them together. I am not sure my technique is great yet, I totally bluffed it, and it worked, so did not investigate more, but I probably need to pay more attention to the sewing part. 


Pattern: Veste Femme (pattern 22) in Phildar Catalogue A/H 010-11
Yarn: Ecological Wool from Cascade Yarn in silver (see my ethical review here)
Yardage: I  think I used 2 full skeins (unfortunately I had used the yarn for something else, so it was not in full and intact skeins when I knitted with it). 
Needles: 7 mm (to get a light fabric - do try to make a sample to get the right fabric)
Size: I made the size 46/48 based on my gauge
Modifications: I did not make any modifications - even added the pockets. I did block it differently however. I did the neckline, shoulder and arm seams, and block it flat - and then did the side seams. 
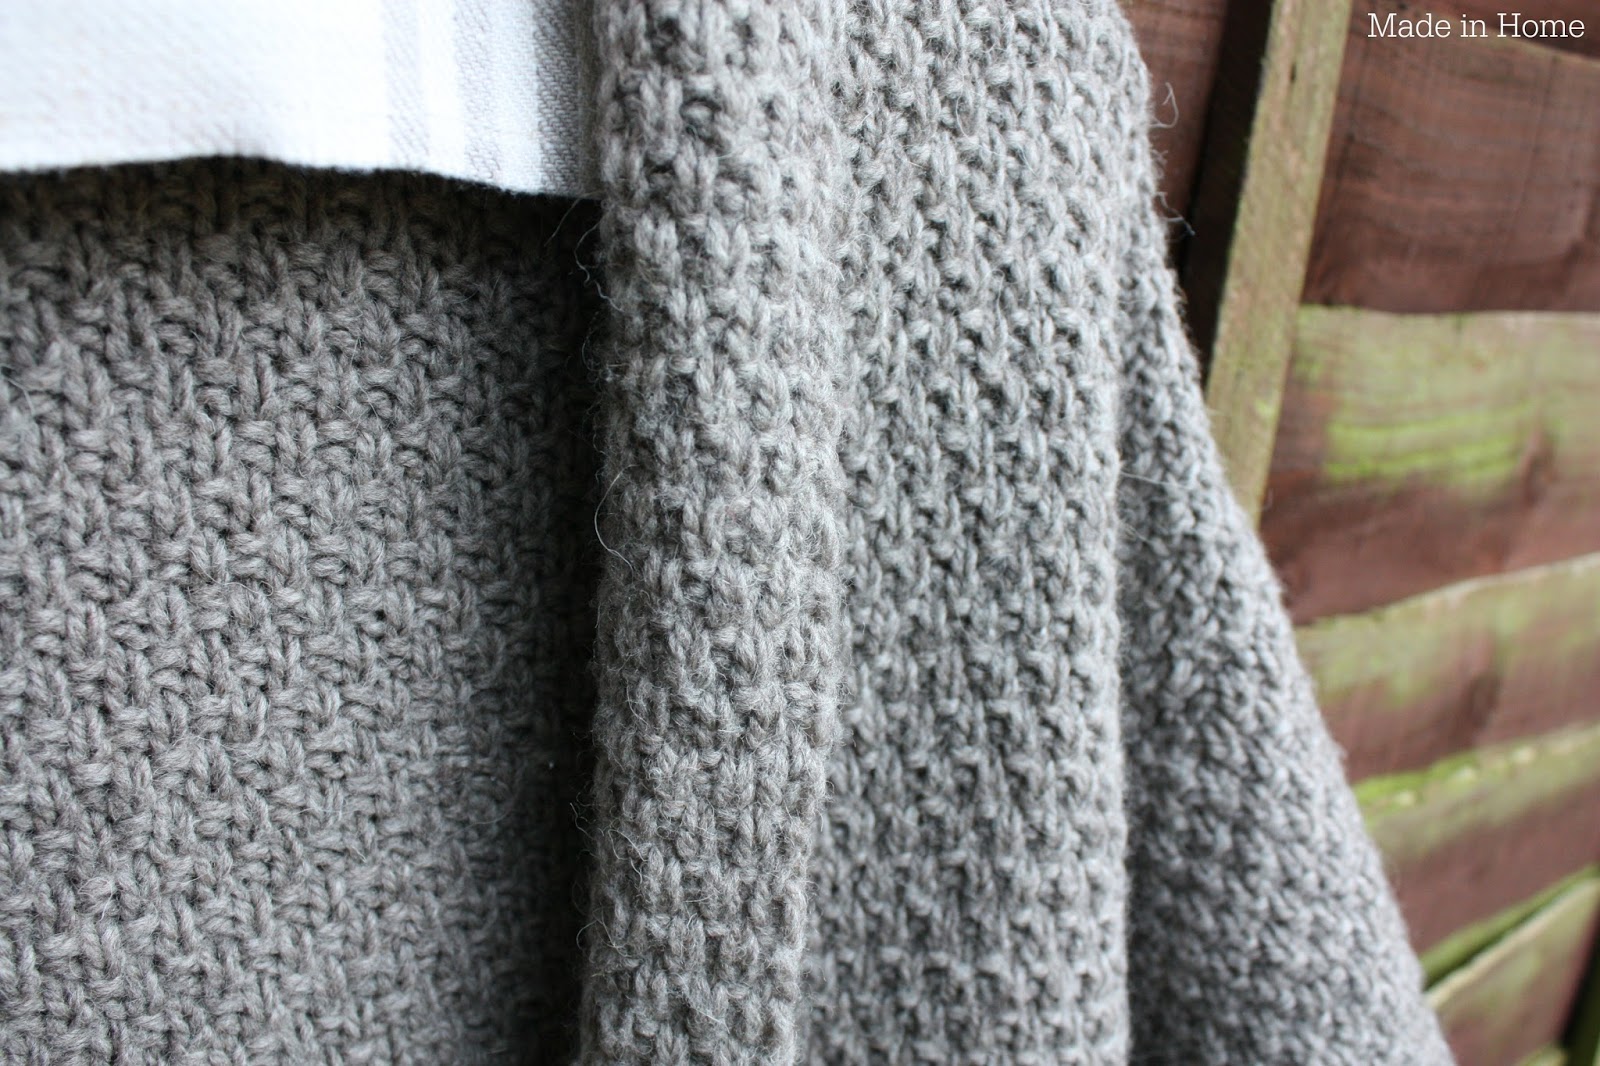
Future Modifications: Although I love the double moss stitch, I think it would be interesting to knit this in another stitch to add some visual interest based on the same pattern. Also I may make the front panels larger to add even more drape.


Here is a quick review for you: 


Wearability: 4/5 - It is totally wearable - as soon as it is finished. I did not give it full marks because I do not like the way the edge looks, I would like them a bit neater to make it less hand-knitted (any tips?). 
Time spent: 4/5. I did not keep exact timing, but 3 months for a hand knitted garment for me is fast knitting, I think this could be done in a month if you really focused on it. 
Boredom factor: 4/5. There is so much double moss stitch one girl wants to knit over a month. I was easily distracted by other projects. 
Difficulty: 2/5. There is quite a bit of shaping at the shoulders, but overall it is quite easy to knit as it is mainly based on rectangles. 
Pricing: a bit less than £30 for the yarn and a few evenings of watching your favourite series on Netflix. Not bad value.  


This a great pattern to have for a basic cardigan in any wardrobe. It looks easily adaptable to your needs, and you can easily add more interest than I have done here. I may consider making another one of these. 

Acorn with a pompom :: Crochet ::

Tuesday, 10 November 2015


Hello everyone! I was really happy to work on these pictures today - it reminded me of the good times of this weekend, and that despite everything we can have some happy times still. Sadly my Grand dad passed away last Friday, exactly a month after Little Baby MiH. It was all expected, the timing is less than ideal though - and this weekend away was much needed. 

Making hats for my cheeky monkey is also making me happy - seeing him making funny faces (or licking the fence, wtf?) is uplifting. And I love this hat on him. He loves the pompom of course - he shakes his head about to make the pompom shake. Also that crochet texture is amazing - I cannot actually believe I made this! 


 Pattern: Acorn by Kat Goldin (I already posted about it here)
Crochet hook size: 5.5 mm
Yarn: De Rerum Natura Gilliatt in poivre (I reviewed the ethics of the yarn here), the pompom is made out of Malabrigo Yarn Merino Worsted in pearl
Size: I made the biggest size for him (4+ rather than toddler size)
Modification: The pattern was available in LandScape. I had to add repeats of the pattern to make the beanie hat big enough - I am not sure whether it is a problem with the printing of the pattern or because of my yarn choice. Anyway I had t make 6 repeats in the end. I also make the puffs more prominent by adding yarn overs. And of course I added the pompom. 


This hat made me realise that I actually do like to crochet, and should be doing more of it. It also opened by eyes to the texture you can achieve in crochet - amazing, who knew! There is a whole world out there of crochet texture ready to be explored me thinks!

Study of honeycomb :: Knitting ::

Wednesday, 16 September 2015


Hello everyone! How are you doing? It is Wednesddaaaayyyyyy!!! I have been thinking about this post for a long time. When I was in Brittany this summer, I kept seeing jumpers with a honeycomb stitch pattern all over - especially this one, but I was not ready to pay that price. So I decided to find/knit the honeycomb stitch pattern they used - and after a bit of research I ended up with testing out 4 stitch patterns.

As you can see there are a few options. I knitted 35 stitches in all samples - with the same yarn: Cascade 220 Superwash in Straw (870) on 5 mm needles (destashing). As you can see the samples vary massively in sizes (yes knitting a gauge is critical!). They are all quite easy to knit (once you figured out the obscure symbols - thank you youtube!).

Apart from the effect the texture creates, I would also consider the thickness of the resulting fabric, as if it was all over a jumper (rather than a detail), I could potentially put on some unnecessary extra weight.. Not necessarily a good look - a knowing me a jumper that will stay in my wardrobe.  


1. BRIOCHE HONEYCOMB

This stitch pattern was the most confusing one, and I ended up on this youtube video, and then it all made sense


The written stitch pattern is as follows (on even number of stitches):

Row 1 (RS): : Sl 1 wyif, *k1, k1 through center of st in row below; rep from * to last st, k1.
Row 2: Sl 1 wyif, *knit tog next st and longer loop at its base, k1; rep from * to last st, k1.
Row 3: Sl 1 wyif, *k1 through centre of st in row below, k1; rep from * to last st, k1.
Row 4: Sl 1 wyif, *k1, knit tog next st and longer loop at its base; rep from * to last st, k1. 


Rep Rows 1-4 for pattern
  • When knitting into centre of the stitch one row below on RS rows, the new stitch will hold the "heads" of both the stitch that was on the left-hand needle and the stitch below it. In other words, the stitch that was on the left-hand needle drops down.
  • When working the wrong-side rows, insert the right-hand needle under the longer loop at the base of this stitch (this long loop is the stitch on the previous row that was dropped down) and then into the stitch on the left-hand needle; then knit them together.
This is quite a stretchy fabric, maybe not ideal for fitted garment - also the the fabric is quite thick. But it is really quick and the pattern is quite striking, so it might be ideal to add some details to something. 


2. PEARL BRIOCHE


This stitch is really subtle and creates quite a light fabric with some interest. Blocking has helped quite a bit. It is also very quick to knit - but beware R1 is the wrong side, and it felt a bit wrong, but it is not, just keep going like the pattern tells you.

This stitch pattern is knitted in a multiple of 2 sts and on a 4-row repeat.

Row 1 (Wrong side): K2, * yf sl 1 yo, k1; repeat from * to end.
Row 2 (Right side): K1, * brk 1, k1; repeat from * to last st, k1.
Row 3: K1, * yf sl 1 yo, k1; repeat from * to last st, k1.
Row 4: K2, * brk 1, k1; repeat from * to end.

Knitting abbreviations:

yf sl 1 yo, k1 Bring working yarn to front under the needle, slip 1 stitch purlwise, bring working yarn over top of needle to the back. This produces a yarn over that crosses over the slipped stitch. 

brk 1: Knit the stitch that was slipped in the previous row together with its yarn over. Because the yarn over wasn't counted as a separate stitch on the previous row, no real decrease is made.

3. HONEYCOMB

This is the easiest but least impressive texture I knitted. I think this was my first sample, and I was wondering at the end where I was going with this, and whether I would ever match the stitch I saw on that jumper. 


R1: *k1, sl1*, rep from * to end
R2 and R4: purl
R3: *sl1, k1*, rep from * to end

sl1: slip one stitch

It could be that the yarn I am using is too busy to show this pattern, maybe aneutral block colour would be more appropriate. The good thing is that the fabric is quite tight and will keep you warn in winter. 


4. DIMENSIONAL HONEYCOMB

I pinned this picture more than a year ago, and I knew I wanted to find a stitch pattern that would add interest to cuffs - such a clever trick. I think this one will do the trick. It is not as intricate as the pin one but it would add beautiful texture and interest to a jumper or cardigan. The fabric is quite thick, which is probably why I am more thinking along the lines of cuffs rather than a whole garment. 


Here are the instructions (on even number of stitches, a 4-row repeat):

R1 (RS): k1, *1/1RC, 1/1LC*, k1
R2 and R4: P1, purl all stitches, P1
R3 k1, *1/1LC, 1/1RC*, k1

1/1RC (right cross): with needle in front of first stitch, knit second stitch on the needle them knit first stitch, slipping them both off the needle. 
1/1LC (left cross): With needle behind the first stitch. knit second stitch on the needle through the back loop, then knit first stitch , slipping them both off the needle. 


So here are different options for adding interest to cuffs or the back of a garment maybe. My favourites are the pearl brioche and the dimensional honeycomb. What are yours? 

I am linking to yarn along today. 

Double Moss Stitch WIP :: Knitting ::

Wednesday, 9 September 2015


Hello Wednesday! And hello WIP day! I am posting this cardigan project as I really need to show my commitment to finish it in the (very) near future - before it gets really cold. It is totally cardigan weather at the moment, so easy - you put it on, and off you are running your errands. Don't get me wrong I love scarves, beanie hats, layering - but it is takes forever to get ready (and this is just half the battle, I have to dress the kids too!). 

This project is quite frustrating as a WIP because you basically knit 3 rectangular-ish pieces that you will sew together. And therefore to actually imagine the cardigan (or whether it is going to be your size after all that knitting) is quite hard - I did not even attempt to take a picture of all the pieces. The model is featured in the Phildar magazine, and I am hoping for a similar result.. But who knows? These pieces do not give me anything - my next cardigan project will have to be knitted in the round.

Also I love double-moss stitch, but I may be having a double moss stitch indigestion here. It is the only stitch used, not a little yarn over, or little cable to break the pattern. However I do love how flat and neat the knitted fabric is, it is going to make it (hopefully) so much easier to put together. 

I am using some yarn from my existing stash - I must have had a massive project in mind, because I have loads of this yarn, but cannot remember what it was. So I am glad this project is using quite a bit of it. It is from the Ecological Wool from Cascade Yarns - you might be interested in my ethical review of the yarn here. This yarn is undyed. 

It is a bit rustic, in fact I was quite reluctant to use it for a cardigan, I was worried that it would be too stiff or too itchy on my skin. However once I made my swatch I was quite pleased with the result - due to the fact that I have to knit with 7 mm needles and therefore the fabric is quite light as a result, and because the cardigan is supposed to oversized and should not be too close to my skin. 


It is all serious reading at the moment. I am more and more interested in finding out about nutrition, and just got Potatoes not Prozac out of the library yesterday. It talks about sugar addiction - how it affects people (oh mood swings, I loathe you) and how to deal with cravings etc. I have managed to eradicate all refined sugar out of my diet, and I am working on the boy's diet. I am hoping this book is going to help me be even more vigilant about hidden sugars in their food. However as it is quite heavy reading for the evening, I am more likely to fall asleep on it... 

I will be joining Ginny today, it is good to be back in blogland!  

Dots and Bobbles :: Knitting ::

Monday, 16 March 2015


Let me introduce you to Darling Dotty - the latest Truly Myrtle Designs, a feminine crescent textured shawl. I tested this pattern for Libby (I usually test charts), not that there were a lot of issues with the pattern. And it is finished, blocked, ends weaved.. And now even pictures have been taken!

Oh my, I love the texture - I have never knitted anything like it, and the result is so impressive. Even Mr MiH was impressed when he saw the shawl being blocked. 


Pattern: Darling Dotty by Truly Myrtle Designs
Yarn: Rowan Baby Merino Silk DK in Dawn
Needles: 4.5 mm
Modifications: None, except changing the needle size because of the gauge


I am not going to lie, the border takes a bit of time - a row per day was my pace. But it does finish the shawl beautifully. I am hoping to use the techniques of this shawl for another project, especially the 'dots' stitch - it would be a great embellishment on a simple garment. 

Small, Light and Fluffy cakes {Recipe}

Friday, 16 November 2012

I was looking for a recipe for madeleines - one of my favourite little cakes, perfect for with a cup of tea in the afternoon. I found a recipe in French, baked them and although the cakes are really lovely, they are no madeleines - not buttery enough for my taste (maybe that is a good thing though). However it is a great recipe - very quick (8 minutes baking time!) and the texture is lovely and fluffy (perfect for dunking). And no weird ingredients needed. 


To make these you will need (you should be able to make 30 but it depends on the mould you will use)
  • 225g plain flour
  • 175g of sugar
  • 100g of butter (melted)
  • 11g baking powder
  • 1 pinch of salt
  • 4 whole eggs
  • Zest of a lemon
  • I added a tsp of lemon extract and a tsp of vanilla extract. 
How to make them?

1. Mix the sugar and eggs together
2. Add the sifted flour, baking powder, and pinch of salt
3. Add the lemon zest and melted butter - and mix thoroughly
4. Butter the mould (I used a vintage mince pies mould to try to get the unusual shape)
5. Fill 3/4 of each mould with a teaspoon
6. Leave to rest for 20 minutes and preheat your oven to 220C
7. Bake for about 8 minutes (stay next to the oven).. 

Et voilà!


I really love the texture of these, but I think they only work as little cakes, it would be too much as a whole cake. Hope you enjoy this new recipe.