Here it is – the book clutch tutorial (well a written version of how I made it)! I decided to ‘write’
it in two parts – the making of the book clutch cover and then the covering of the
box. I am not one to write a lot in tutorials – so there will be a lot of
pictures and a few words and tips along the way.
You will need:
- - Kona solids fabric in orange and cream
- -
Black Felt
- -
Iron-on adhesive like Heat’n’Bond
- -
Backing fabric (it will not be seen so whatever
you have)
- -
Batting
- -
Embroidery thread in black and orange
- -
Quilting thread in cream
- -
All the materials for printing on fabric
(tutorial here)
- I would strongly recommend that you get a
vintage penguin book (I scan bits of it, unless you can find an online picture
you are happy with).
The dimensions of the whole cover are dependent on the size
of your box. The finished dimensions should be width of the box, and the
length of the box + 1cm (to take into account the covering of the spine with
the batting.
For my box, I needed a cover of 16cm wide and 28cm long.
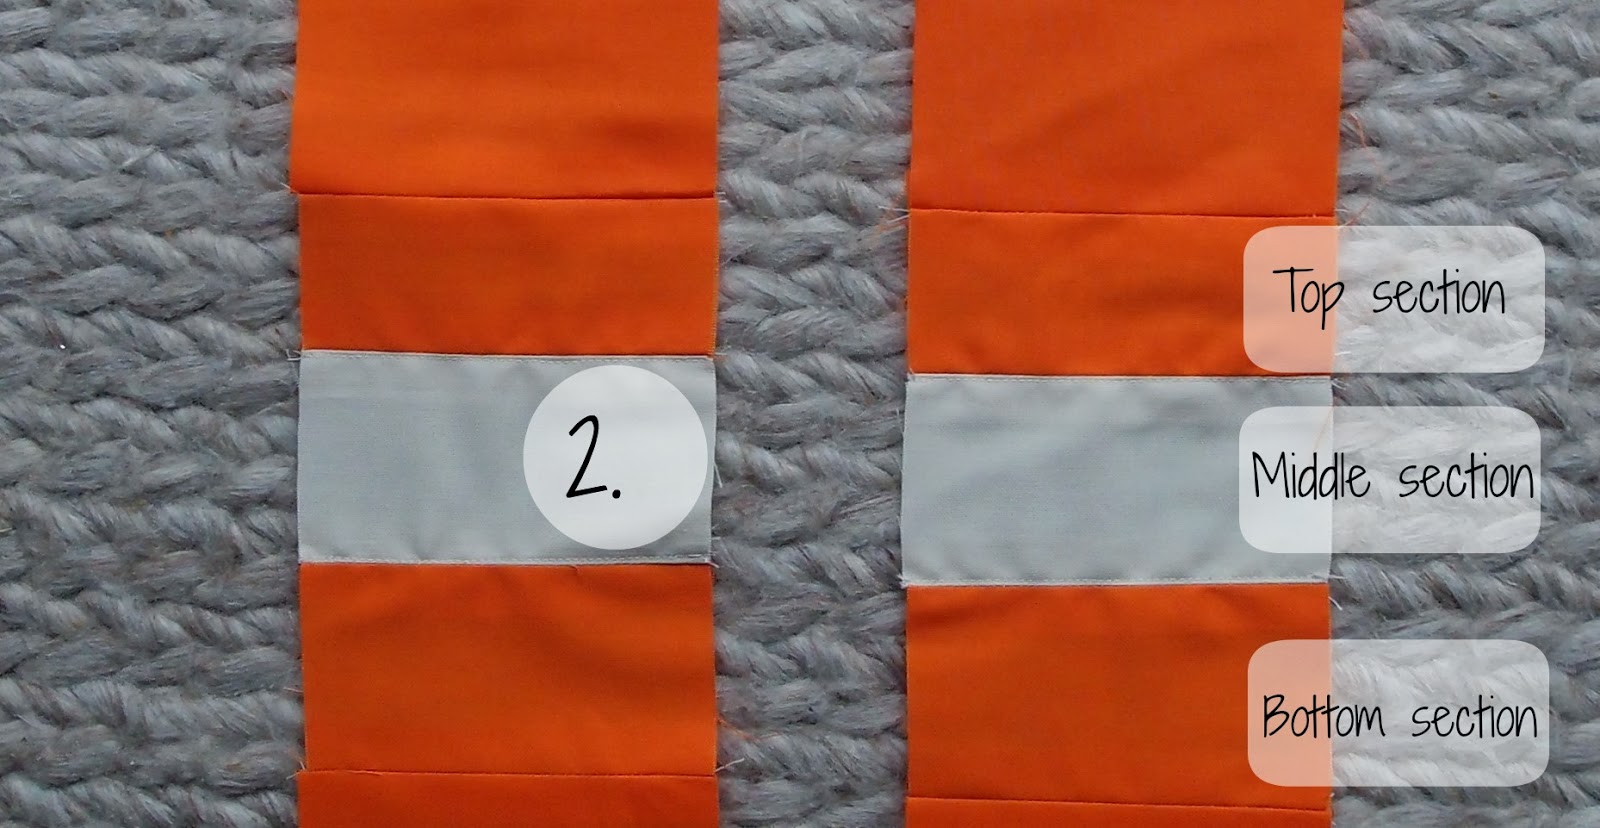
The cover follows the proportions of a penguin book – top orange
section is 5.4 cm , middle cream section 6.9 cm, bottom orange section is 5.7
cm. I ended up with: my finished top orange section is 4.8 cm, my finished
middle cream section 6.1 cm and my finished bottom orange section is 5.2
cm.
You are all still with
me?
Let’s talk about seam allowances. I like to have quite a
bit, so usually 1cm – you decide. However for the top and bottom edges and side
edges you will need to be able to ‘cover’ the batting to make it like a book
cover, I left 2.5cm (but I would leave more next time). So the unfinished
cover should be 21cm wide and 33cm long.
So we know what we are
aiming at… Now about the details…
You will have to start to print on fabric using my tutorial here.
The cream part includes the title and the author at the front, and the title on
the spine (based on a penguin book).
To position the title, I printed the cutting line of the
cream section including the seam allowances. Also you have to measure the front
and the width of the box to section the length of the cream fabric. I have done
all of this in a word document.
You don’t have to follow this step – I just find it much
easier to do the embroidery with a template especially to place it, and you can
tinker a lot with the word document before it is set.
On the bottom orange section, I added ‘Complete Unabridged’ and on the top orange section: the author on the spine. Again you
need to place the writing so that the penguin will fit and that it is still
central.
Et Voilà!
You may have noticed that the dimensions (length wise) of
the sections you need to print are bigger than a A4 sheet. However only half of
the section needs to be printed on, I pulled through the rest of the fabric,
just be careful not to tear your fabric.
Have you made it to
here? Great, let’s add more details then.
The ‘Penguin Book’ top logo and the
penguins are based on scans of the penguin book I have. I printed the specific
parts on fabric and ironed on black felt using Heat 'n Bond.
The logo is ironed on the heat’n’bond, then cut out and then
ironed on black felt.
You cut out outside so that you can see the felt framing the
logo.
And you get to do the same with the penguins. The little one
for the spine is really hard to make – just warning you, you could just skip it…
You sew the three sections together and add the logos onto
the cover (more heat’n’bond and some stitching).
It is starting to look
very much like a Penguin book right?! It is time to add the handmade look!
You need to add the batting and the backing fabric to add
some texture to your embroidery.
I did some machine embroidery (around the ‘penguin books’
logo and the penguins) and hand embroidery (everything else). I used different
stitches to make sure that the writing could still be read but that it covered
the printing. I also added the bar between the title and the author on the
front cover.
And fold the seam allowance around the batting to make it a
cover.
Nearly there….
I added my label… Whoohoo!
And you are finished!
Easy right?! Tomorrow I will show you how to cover the sides
of the boxes and put together the book clutch! I hope you enjoyed the tutorial
and will have a go at making your own.
If you don’t feel like making one for
yourself, don't hesitate to contact me, I would love to make your own unique version!